All owners of domestically produced cars face the need to adjust the ignition. Especially when it comes to older vehicles. This material will help you find out how to car a VAZ 2106 and in what cases it may be required.
[Hide]
In what cases is ignition installation necessary?
There are several symptoms by which the car owner can determine that it is necessary to adjust and set the ignition breaker:
- Inability to start the motor.
- Increased consumption of gasoline. Of course, this may be due to the need to adjust the carburetor, but this also happens. For example, if the ignition is set later, then the dynamics of the car will be low, and in order to accelerate normally, the engine needs more air-fuel mixture.
- The appearance of shots in the muffler. If the explosion is following it, it will take some time for the gases to expand. In the event that the piston reaches BDC, the next exhaust stroke will be, which means that a certain amount of fuel will be transferred to the exhaust system. Accordingly, claps will appear as a result.
- The power unit has become more noisy. and you will need to put 2106 correctly in case of shaking and tripping of the motor. The upward piston makes the work of the power unit more rigid, while the explosion of the mixture will occur towards it.
Installing and adjusting the distributor
On a VAZ 2106 car, repair of the distributor is necessary in case of its incorrect operation, but if this element is working normally, in order to set it correctly, you first need to set the marks. The crankshaft rotates either by the ratchet, or using a special wrench for the nut. On the cover of the power unit, you can see the marks.
To put the ignition correctly, the marks must be correctly aligned:
- The established first meta in the direction of travel is ten degrees ahead of the angle. This parameter is relevant to use for cars running on 72 fuel.
- The mark located in the middle is five degrees ahead of the angle, which is optimal for cars running on 80 gasoline.
- The last risk is a 0 degree lead angle. This means that the ignition of the combustible mixture will be carried out while the piston is located at TDC. When setting labels, you need to take these nuances into account.
When you finish placing marks, you need to put the desired gap in the contacts. To do this, the slider of the distribution unit must be removed and the fixing bolt of the interrupter element must be unscrewed. It is recommended in advance to clean the contacts with sandpaper. When open, the contact gap should be no more than 0.4 mm.

Before, it is necessary to unscrew the mounting of the distribution unit with a wrench, then it can be removed from the body.
In order for the unit put in place to work correctly, take into account the following nuances:
- The adjustment was carried out according to the TDC mark on the 1st cylinder, so at the moment the appearance of a spark should be carried out in it. To catch this moment, it is necessary to install the cover of the VAZ 2106 distributor and mark the place where the high-voltage cable of the spark plug from the first cylinder enters. Then it is necessary to dismantle the cover, after which the external contact of the slider is set opposite the risks.
- After that, in order for the power unit to work in normal mode, a conditional line should be drawn between its clamps and the mechanism should be placed in the installation site in such a way that this line is parallel to the motor block. It should be noted here that it is not always possible to get into the slots right away, perhaps for this it is necessary to scroll the body a little. In principle, this is not scary, since the ignition will still need to be adjusted in the future. You need to ensure that the mechanism can completely sit in the installation site, right until the moment, until it completely rests on the block. Having done this, the knot can be pulled into place (video by Andrey Gorinov).
Device malfunctions
Replacement and repair of the distributor on the domestic "six" is carried out in case of incorrect operation of the mechanism.
Below are the main symptoms of breakdowns that indicate possible malfunctions:
- The vehicle jerks while driving. Moreover, these twitches are not at all typical for a car.
- The entire engine will not start.
- When trying to accelerate the car, the car can also twitch, and the acceleration process itself takes a lot of time, while the engine can detonate - piston rings knock.
- Increased fuel consumption.
As you can see, in general, the signs are similar to those that appear when the ignition is incorrectly set. Of course, if such symptoms appear, it is impossible to say for sure that the malfunction lies precisely in the distributor, however, attention must also be paid to the diagnosis of this unit.
As for the breakdowns themselves, which can force the car owner to repair or replace the mechanism, they are as follows:
- The knot slider is worn out and burned out.
- The problem lies in the cover itself - the contacts on it could burn out.
- Hall sensor breakage. The problem may be associated not only with the breakdown of the controller, but also if there is a bad contact on the plug of the controller.
- Another reason that domestic drivers often encounter is the distributor bearing. It could become loose for a long time, but it could also just get jammed.
- The presence of mechanical damage, including cracks on the lid.
- Engine fluid enters the distribution unit, usually the problem is related to the tightness of the cover.
The VAZ "seven" is the last classic model of the Zhiguli, produced from 1982 to 2012. Moreover, the injector and electronic ignition appeared on the VAZ 2107 car already in the 90s, and all previous modifications came with a carburetor and a mechanical (contact) sparking system. Since a lot of such cars "run" on the territory of the countries of the former USSR, the issue of switching to contactless ignition (abbreviated as BSZ) does not lose its relevance for their owners. It is solved without any problems, you just need to buy a set of new equipment and put it on the G7 with your own hands, so as not to spend money on car service services.
Electronic ignition design
To put a contactless system on the "classic" VAZ 2107 with a carburetor, it is advisable to study how it works. This will help you build the circuit correctly and get it up and running successfully. BSZ for old Lada carburetor models consists of the following elements:
- distributor, he is also the distributor of the ignition system;
- high-voltage coil of a new design (different from the old one, working with mechanical contacts);
- a switch responsible for managing the system;
- high-voltage and ordinary wires with connectors and terminals connecting the listed elements;
- spark plug.
Reference. Since the new ignition system does not have a contact group, and its operation is controlled by an electronic unit, the names "contactless" and "electronic" are equally suitable for it.
The new high voltage coil has 2 windings. The primary is made of a large conductor and is connected to the car's electrical network through the ignition switch relay. The secondary winding is wound with a large number of turns of thin wire and connected with a high-voltage wire to a distributor, consisting of the following parts:
- a housing with a centrally mounted shaft;
- a movable contact (so-called slider) is fixed at the end of the shaft;
- a cover is put on the top of the body, where high-voltage wires of large cross-section are connected to the spark plugs;
- there is a protrusion (cam) on the shaft, opposite which the Hall sensor stands;
- a vacuum diaphragm is attached to the side to provide ignition timing.
The switch is connected by conductors of small cross-section with a distributor and a coil, its task is to control the timely supply of a spark to the candles.
Reference. In newer versions of the VAZ 2107, where an injector is installed instead of a carburetor, there is no separate switch. There is no need for it, since the on-board computer controller is in charge of sparking and fuel supply.
The principle of operation of BSZ
Electronically controlled sparking operates according to a fairly simple algorithm, which determines the reliability of such a scheme. When the driver turns the key in the ignition lock, a constant voltage from the on-board network is applied to the primary winding of the coil, which creates a magnetic field around it. Then the system works like this:
- The starter turns the crankshaft and drives the distributor shaft together with the slider.
- The Hall sensor, which reacts to the passage of a nearby metal mass, registers the rotation of the shaft along the protrusion on it and sends a signal to the commutator.
- The electronic unit, on a signal from the sensor, turns off the voltage supply to the primary winding of the coil.
- At the moment of breaking the circuit, a high voltage pulse (up to 24 kV) is generated in the secondary winding of the coil. It is directed along a thick wire to the moving contact of the distributor.
- The slider redirects the impulse to one of the fixed contacts built into the cover. From there, the voltage goes to the spark plug of the cylinder where the piston is at top dead center.
- At this point, the fuel is already compressed in the combustion chamber. When a spark jumps on the electrodes of the candle, it ignites.
- The slider rotates and transmits a spark to all cylinders according to the 1-3-4-2 scheme, after which the engine of the car starts up and starts working.
Note. In old VAZ 2107 cars, there was no switch, and the electrical circuit was broken mechanically - the shaft cam opened the contact group.
Pros and cons of contactless ignition
At the moment, an electronically controlled sparking system is equipped with 100% of manufactured vehicles that use gasoline or liquefied gas as fuel. Mechanical ignition is obsolete and a thing of the past. The reason is its unreliability during operation, frequent malfunctions and low spark power. Compared to the contact system, BSZ has the following advantages:
- Lack of contacts, whose surfaces are constantly burning from high voltage, which is why the sparking power drops sharply.
- In the distributor of the electronic system, there are no wearing parts that had to be changed every 15-20 thousand kilometers.
- Thanks to the contactless circuit and the new design of the coil, the voltage supplied to the electrodes of the candles was raised from 18 to 24 kV. This has a beneficial effect on the ignition and combustion of the air-fuel mixture in the cylinders.
- Operational reliability and durability.
Reference. In the past, the owners of the VAZ "classics" quite often had to remove the protrusion burning on the surface of one of the contacts, which required a flat file. But on the second contact, a depression was formed, which is difficult to clean, so manufacturers began to make contact groups with through holes.
Of the significant disadvantages of BSZ, one can be noted - the non-repairability of the Hall sensor. If the mechanical contacts are cleaned up, then the faulty sensor only needs to be changed, so it is advisable to carry it with you. On the other hand, this device is very reliable in operation and serves 40-50 thousand km without problems.
Reference. The owners of VAZ 2107 cars equipped with the first sets of BSZ, in addition to the Hall sensor, also had to carry a spare switch. But after 2 years, its design has undergone modernization, which is why the electronic components have ceased to fail.
Installation instructions for contactless system
The procedure for replacing a mechanical ignition with an electronic one is divided into the following stages:
- selection and purchase of BSZ;
- preparation of tools;
- removing the old system and installing a new one;
- ignition setting.
If earlier you did not have to independently deal with the problems of sparking in classic Zhiguli models, then you will have to allocate about 3-4 hours for the whole work.
The commercially available BSZ factory kit for VAZ 2107 includes the following parts:
- switch with catalog number 36.3734 (sometimes 3620.3734);
- main ignition distributor, marking - 38.37061;
- high-voltage coil, catalog number - 27.3705;
- harnesses with connectors.
Note. The distributor marking is indicated for cars with engines of 1.5 and 1.6 liters. In modifications of "sevens" with a 1.3 liter engine, the cylinder block is smaller in height, and the ignition distributor shaft is shorter. Its catalog number is 38.3706-01.
On sale there is a similar contactless kit designed for the Russian off-road vehicle VAZ 2121 "Niva". In it, the distributor is marked as follows: 3810.3706 or 38.3706-10. It is not worth buying it for the "classic", since the element differs in technical parameters, although it looks the same outwardly.
Among the manufacturers producing ready-made electronic ignition kits for old VAZ models, SOATE, whose production is located in Stary Oskol, Russian Federation, has recommended itself the best. Reviews of the owners of the "classics" about the company's products are purely positive.
Advice. When planning to put BSZ on the "seven", in parallel, replace the spark plugs (brand - A17DVR) and high-voltage wires to them. They are not included in the scope of delivery, but they will be very useful for stable and economical operation of the engine with the new sparking system.
What tools do you need?
To install the electronic unit and other elements of the gas station, you will need a simple toolkit available in the garage of any skilled motorist:
- flat and Phillips screwdrivers;
- open-end keys in sizes 8, 10 and 13 mm;
- conventional pliers;
- a candle wrench equipped for convenience with a cardan;
- manual or electric drill with a drill with a diameter of 3-3.5 mm.
Note. With the help of keys, the terminals, distributor and coil fasteners are unscrewed. You will need a drill to make 2 holes for mounting the switch. In some cars, you can find ready-made holes designed for mounting electronics, they are located on the left side member (in the direction of the car's movement).
It's good if you manage to find and take for a while a special key designed to turn the VAZ 2107 crankshaft by grabbing the ratchet nut. Another option is to rotate the crankshaft with a regular open-end wrench of 30 mm or by turning the suspended rear wheel with the 4th gear engaged.
You can carry out work on the installation and configuration of contactless ignition in any convenient place, as long as the weather conditions allow. Since you don't need a viewing hole, a flat and well-lit platform will do.
Installation of BSZ on a car
Before installing the electronic ignition, you need to remove the old system from the car, proceeding in this order:
- Lift the hood cover of the "seven", disconnect the battery from the on-board network and remove the high voltage wires from the spark plugs.
- Remove the plugs and turn the crankshaft to bring the piston of the 1st cylinder to the top dead center (TDC). A long screwdriver inserted into a candle well will help you with this. Make sure that the notch on the crankshaft pulley is against the first mark on the cylinder block (it is the longest of the three).
- Unlock the metal catches of the ignition distributor cover and remove it along with the wires. To be sure, put a mark on the engine valve cover opposite the moving contact of the slider.
- Disconnect all wires from the distributor and the thin tube that connects it to the carburetor fitting. Loosen the nut holding the distributor skirt to the cylinder block and unscrew it. Remove the old distributor, making sure that the gasket is not lost (it stands between it and the block).
- Disconnect the wires from the contacts of the high voltage coil and remember where they were connected. Unscrew the coil bracket and remove it from the body.
Start the BSZ installation by installing the electronic unit equipped with an aluminum mounting plate with holes (it serves as a cooling element for the device). If there are ready-made holes on the left side member, screw the switch to them with two self-tapping screws. Otherwise, find a free space near the coil, drill holes and secure the control box.
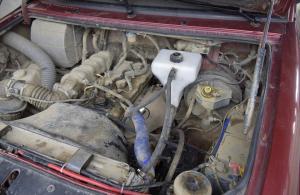
Advice. Do not place the switch under a windshield washer fluid reservoir. If it leaks, it will flood the delicate electronics and the ignition will stop functioning.
Install the elements of the contactless system in the following sequence:
- Take a new distributor, remove the cover from it and put on the gasket. Install it in the socket on the cylinder block so that the movable contact is against the chalk mark painted on the engine valve cover. Press down the distributor skirt slightly with the retaining nut so that it does not accidentally turn.
- Screw the high voltage coil back to the old place (fixings match). Connect the wires from the ignition switch relay, tachometer and switch to its terminals. The core coming from the contact "1" of the electronic unit is connected to the terminal marked "K" of the coil, and the wire from the contact "4" is connected to the terminal "B".
- Having established a gap of 0.8-0.9 mm between the electrodes of the spark plugs, screw them into the cylinder bores. Put the cover on the distributor and connect all high voltage wires, including the central one leading to the coil. Connect the vacuum tube, then you can start starting the motor and adjusting the timely sparking.
Advice. When installing the high-voltage coil, the terminals are swapped, which causes some inconvenience. The issue is solved by loosening the nut of the fastening clamp and turning the coil body 180 °, after which it can be put in place.
Stages of installation of ignition in photos
The position of the slider with aligned marks Before placing marks, you need to remove the distributor cover Unscrewing the wires of the old distributor Removing the central high-voltage wire from the coil When all the wires are removed and the fastening nut is unscrewed, the distributor is removed from the block After installing the new coil, the wires are connected to the same terminals. High-voltage wires must be connected, guided by the numbers on the cover The switch is attached to the spar with 2 self-tapping screws
Video material on replacing ignition with electronic
Ignition Setting Instructions
If you strictly followed the instructions set out, connected all the wires according to the diagram and did not knock down the aligned marks, then the motor will start without problems. To adjust the ignition, you need to achieve stable engine operation, so first warm it up for a few minutes without letting it stall by pressing the gas pedal.
Advice. If the start of the engine fails, and even pops do not appear when the starter is turned on, then you probably messed up with the wiring. Recheck everything according to the diagram supplied with the factory kit of electronic ignition parts.
There are two methods of adjustment on a warm engine:
- without the use of special devices - "by ear";
- fine tuning with a stroboscope.
A stroboscope is a device with a light that flashes simultaneously with the transmission of an impulse from the Hall sensor. When the switched on stroboscope is brought to the crankshaft flywheel with the engine running, the position of the notch becomes visible. Hence the possibility of fine adjustment.
To adjust, connect the stroboscope power to the battery, and the thick conductor to the high-voltage wire of the 1st cylinder spark plug. Loosen the distributor retaining nut and bring the flashing lamp to the pulley. Slowly turn the distributor body until the notch on the pulley takes place opposite the short mark, then tighten the nut.
Tuning in the folk way "by ear" is performed as follows:
- Start the engine and loosen the nut holding the ignition distributor.
- Smoothly and slowly rotate the distributor within 15 °. Find the position where the motor runs most steadily.
- Tighten the retaining nut.
Advice. When you start turning the ignition distributor by hand, try not to touch the high voltage wires so that you do not get an electric shock. The best option is to grab the body of the membrane mechanism, where the tube from the carburetor is attached.
It is quite natural that after the installation of the contactless ignition system, the idle speed of the engine will increase to 1100-1200 rpm due to the increased power of the spark. Set the rate to 850-900 rpm by tightening the idle screw on the carburetor and referring to the tachometer. On VAZ 2105-2107 carburetors of the "Ozone" type, this screw is located in the lower section of the unit on the right side and is large. In VAZ 2108 carburetors of the Solex type (these were also put on the "seven") there is a long plastic handle protruding to the right (in the direction of travel). The second screw, which regulates the air-fuel mixture, must not be turned.
Advice. If, during a sharp press on the accelerator, a loud knock is heard from the engine, then you have set the ignition timing too large and the mixture flares up earlier than necessary. Loosen the distributor nut and turn the body a couple of degrees clockwise.
Video about ignition adjustment on the "classic" Zhiguli
The best indicator of a successful installation and setup of a contactless ignition system is checking the VAZ 2107 on the go. It is worth driving a car for several kilometers to check it under various modes - acceleration, movement in a straight line and coasting with the gear engaged. You will surely like the behavior of the machine, and the hateful cleaning of contacts will be forgotten forever.
The ignition moment, as well as the UZSK (angle of the closed state of the contacts), is a very important parameter on which the normal operation of the engine depends. If this moment (ignition timing) is set incorrectly, the engine will not start well, run unstable at idle, will not develop full power, overheat and consume gasoline unnecessarily. In addition, if the ignition timing is too high ("early" ignition), detonation may occur - a very dangerous phenomenon that often leads to emergency engine damage.Set the ignition timing (ignition timing) with a stroboscope in accordance with the instructions attached to it.
The proposed method for adjusting the ignition timing can be used for emergency checking during an independent search for a malfunction on the way.
To set the ignition timing on a VAZ 2106 car, you will need: a "13" key, a 12 V control lamp (you can use a portable lamp attached to the car) or a voltmeter.
NOTE
The ignition timing can be set for both 1st and 4th cylinders of the engine. The setting of the ignition timing for the 1st cylinder is shown as more convenient.
 On the cover of the drive of the gas distribution mechanism, three marks are made in casting.
The first, in the direction of rotation of the crankshaft pulley, mark a corresponds to 10 ° ignition timing, the second b- 5 ° and third v(long) - 0 °. There is a mark on the rim of the pulley G TDC. On the hub of the pulley against this mark, a bump is made.
 1. Unscrew the plug of the first cylinder and close the plug hole with your finger.
Engine operation directly depends on the health of the ignition and fuel supply systems. They determine engine power, fuel consumption, throttle response, ease of starting. A failure in setting the ignition timing of a carburetor engine leads to detonation, glow ignition, an increase in the exhaust temperature and a rapid failure of the unit. There are several ways how to set the ignition on a VAZ 2106. All of them are simple and accessible to a novice car enthusiast.
How the ignition system works on classic VAZ engines
1. Core. 2. Insulator. 3. External magnetic circuit. 4. Primary winding. 5. Secondary winding. 6. A layer of corrugated cardboard. 7. Insulating paper windings. 8. Frame of the secondary winding. 9. External insulation of the primary winding. 10. Spring. 11. Cover. 12. Terminal of the output of the end of the primary winding. 13. High voltage terminal (output of the beginning of the secondary winding). 14. Contact screw. 15. Terminal "+ B" of the output of the beginning of the primary winding and the end of the secondary. 16. Bracket for fastening the coil. 17. Housing. 18. Rib of the insulator. 19. Heat sink washer. 20. O-ring. 21. Housing. 22. Rod. 23. Insulator. 24. Contact nut. 25. Central electrode. 26. Side electrode. 27. Contact part. 28. Spring ring. 29. Lock washer. 30. Washer. 31. Block. 32. Spring. 33. Cylinder. 34. Housing. 35. Rotor. 36. Anti-theft device locking rod. 37. Textolite washer. 38. Spring. 39. Roller. 40. Protrusion for connection with the cylinder 41. Projection for connection with the rotor 35. 42. Groove for connection with the drive bush of the anti-theft device. 43. Slip rings of the rotor 35.
The motors installed on the VAZ 2106 differ in displacement, but have the same design. Trambler, timing parts, front cover with marks and crankshaft pulley are interchangeable during repair. There are contact (KSZ) and non-contact (BSZ) ignition systems. In the first case, the contacts are opened mechanically when the distributor shaft is turned by 90 0. In the second version, a Hall sensor and a controller are used, which allows you to accurately determine the moment the spark is supplied to the cylinders.
The simplest contact system consists of the following elements:
- Ignition switch, also known as a switch;
- Ignition coil with two windings to obtain high voltage;
- A mechanical breaker that opens the primary winding of the coil at the right time;
- Rotor and contact cover for voltage distribution to spark plugs;
- Centrifugal and vacuum regulators;
- Transistor for reducing the current in the primary winding and extending the service life;
- Spark plug;
- High voltage wires.
The principle of operation of any ignition system is as follows. At the moment when the piston in the cylinder is in the upper position and compresses the fuel mixture as much as possible, the coil windings are opened. The high voltage through the distributor cap travels through a high-voltage wire to the corresponding spark plug, on the electrodes of which a powerful spark is generated. Ignition occurs. This process is called the working stroke of the piston.
With an increase in engine speed, the ignition timing (IOP) changes, and the centrifugal regulator makes the angle optimal. The vacuum regulator shifts the angle depending on the vacuum in the intake manifold. This allows you to achieve optimal power in all modes of engine operation.
Malfunction symptoms
Ignition adjustment on the car is required after repairing the engine or removing the distributor. Like any mechanical system, it tends to wear out, characteristic symptoms appear:
- Engine will not start or runs intermittently. If gasoline enters the carburetor, then the reason lies in the incorrect setting of the ignition angle or the displacement of the marks on the timing chain.
- Decrease in acceleration dynamics and deterioration of the elasticity of the motor. Ignition of the mixture does not occur at the optimal time, so the efficiency decreases.
- Increased fuel consumption. This happens with late ignition, when, in order to obtain the same dynamics, you have to more actively press the gas pedal. Some of the gasoline does not have time to burn and flies out into the exhaust pipe.
- Late ignition causes muffler popping when the unburned fuel mixture ignites when the exhaust valve opens.
- Hard work of the engine is possible with early ignition of gasoline in the cylinders. An explosion at the moment the piston does not reach TDC is the cause of the characteristic rattling sound and ringing.
An interesting article about biofuels made from ordinary sawdust, in more detail .
Having found a malfunction, you should check the correctness of the ignition on the VAZ 2106, and, if necessary, adjust it. For work, you need a candle key, a key for "13", a light bulb or stroboscope, a plate probe.
Instructions for setting ignition VAZ 2106
Let us analyze 3 well-known methods of adjusting the ignition angle on VAZ engines.
With a stroboscope (by marks)
This method allows you to very accurately set the ignition according to the marks, and does not require removing the distributor and valve cover. The entire adjustment process takes 5 minutes. A stroboscope can be found in any car dealership. The procedure is as follows:
- On a muffled car, we loosen the distributor fastening nut, having previously made a mark on its initial position on its body;
- On the front cover of the engine, we find two short and one long mark, clean them of dirt and oil;
- We connect the negative wire of the stroboscope to the engine ground, the positive wire to the ignition coil, and a special clamp to the high-voltage wire of the first cylinder;
- We start the engine and turn on the stroboscope. The light from its lamp, directed to the pulley, will show the true position of the ignition moment;
- Slowly turning the distributor body, we achieve the alignment of the mark on the crankshaft pulley and the tides on the front cover;
- We check the engine speed by the tachometer and, if necessary, adjust the idle speed on the carburetor;
- Tighten the distributor fixing nut.

The labels have a value at 0 0, 5 0 and 10 0 relative to the top dead center (TDC). For correct operation on 92 gasoline, an advance of 0 degrees is selected.
Light bulb installation
If there is no strobe at hand, and the ignition needs to be set accurately, it is recommended to use a simple 12-volt car lamp. Two wires with stripped contacts are soldered to it. The settings are made in the following sequence:

We set the ignition by ear
It is possible to quickly adjust the approximate position of the distributor without any devices. It takes a little patience and good hearing. This method is applicable only if the carburetor and timing are in good condition. We act in this way:
- We start the engine, let it warm up to operating temperature, the throttle handle in the carburetor must be recessed;
- We slightly loosen the distributor fasteners and begin to gently turn it;
- When turning at large angles, the engine will stall or, on the contrary, increase the speed;
- It is necessary to achieve smooth idle speed in the range of 700-800 rpm without extraneous knocking and detonation;
- In this position, we fix the distributor.
Such adjustment by ear requires checking on the road or with a stroboscope, but for the initial adjustment, this is the best option.
How to install a contactless (electronic) ignition
Installing an electronic ignition is the easiest way to improve engine performance. Replacing with a contactless system gives the following advantages:
- Confident cold start;
- Stable engine operation at any speed;
- High reliability;
- The service life of the spark plugs is increased;
- Powerful spark;
- No clearance adjustment and no centrifugal adjuster required.

The complete set includes a distributor with a Hall sensor, a special ignition coil and a switch. It is possible to leave old high-voltage wires as well.
To install a contactless ignition instead of the old one, we need a key for "13" and "10", two screws for attaching the switch and a stroboscope for adjusting the lead angle.
The order of the work performed:
- We bring the crankshaft pulley to the mark on the engine cover, the piston of the first cylinder should be at TDC.
- Disconnect the negative battery terminal.
- Remove the cover from the old distributor and mark the position of the slider relative to the engine. This will help you quickly install and configure a new distributor.
- Disconnect the wire from the ignition coil, unscrew the latch with the key to "13" and remove the distributor from the engine block.
- We install the new distributor according to the marks made, trying to match the marks on the body and the position of the slider. Do not fully tighten the mount.
- We replace the ignition coil with a new one and install the switch under the hood. Place the electronic unit in a dry place, away from heated parts. For example, on a fender or engine shield.
- We connect the wiring according to the diagram in the instructions for the BSZ. We connect high-voltage wires.
- We close the distributor with a lid and tighten the fastening nut. The system is installed and ready to go. It remains only to adjust the ignition timing.
Checking the ignition angle while driving
It is best to check the performance of the ignition system after any adjustment on the move. This is due to the design features of the distributor and the octane rating of the gasoline used. It so happens that the ignition angles set according to the marks do not give sufficient dynamics and throttle response. The adjustment by ear at the beginning of detonation will help:
- We accelerate the car to a speed of 45-50 km / h on a flat section of the road;
- We turn on the direct transmission (on the VAZ 2106 fourth) and press the gas pedal all the way;
- A characteristic ringing (detonation) should appear, which will disappear after 2-3 seconds, and the acceleration will be smooth and powerful without failures;
- If the detonation does not disappear during the entire acceleration, then the ignition angle is "early";
- The complete absence of ringing and sluggish dynamics indicate a delay in the spark in the cylinders;
- We adjust the position of the distributor in place, turning it 3-5 degrees;
- When the adjustment is completed, the position of the distributor body relative to the block is marked with a line or paint.
Ignition adjustment work should be carried out regularly. The service interval for a simple contact ignition system is 15,000 km, for an electronic one - twice as long. The condition of the spark plugs and high-voltage wires is also regularly checked. All setup operations can be easily done by yourself, a garage is not needed for this. The skill of self-repairing the ignition of the VAZ 2106 will always come in handy on a long journey or in winter when problems arise with starting.
On the "six", the ignition moment should be set according to the marks on the timing belt cover - there are a total of 3 of them.
In addition, the designation appears on the rim of the pulley - this is the top dead center (UIT), and on its hub, on the contrary, you can see a special influx.
Now let's look at the very procedure for setting the ignition. First you need to unscrew the spark plug of the 1st cylinder and close the hole. This can be done with a rubber stopper or just with your finger. Next, we take a special key, and with it we turn the crankshaft. This must be done until the compression stroke begins in the 1st cylinder. It is very easy to recognize this moment. The piston will begin to move upward, and the plug with which you closed the plug hole will fly out, or you will feel pressure on your finger.
The crankshaft should be rotated until the marks on its pulley and the timing cover match. There is one point to note here. The further procedure depends on what brand of gasoline your car is driving. If you refuel the "six" 93 or 95, you need to combine it with the middle mark on the timing case cover. When using fuels with a lower octane number - with a long.
After that, remove the ignition distributor cover. First, unfasten the corresponding latches here. Pay attention to a very important point. After turning the crankshaft, the rotor should be in a position where its outer contact will face the 1st cylinder on the distributor cover. Next, you should do the following simple manipulations. With the aligned marks, draw an imaginary line through the latches of the distributor cover - it must certainly run parallel to the motor axis.
If not, then you need to correct the situation. To do this, unscrew the nut with which the distributor is attached, and turn the distributor itself up. Next, we rotate the rotor axis. This must be done until it is aligned parallel to the motor axis. Then we put the ignition distributor in place. In this case, the nut does not need to be tightened to the end.
Correct ignition adjustment
 One point should be noted. Installed ignition is only half the battle. To get the engine to run like a clock, there is still a few things to do. It is about the ignition control. Let's look at the classic way - using a 12-volt lamp. There is nothing particularly complicated in this procedure here either - the main thing is to do everything right.
So, we take a 12 volt light bulb and connect two wires to it. A large section is not needed here. Next, throw one wire to ground, connect the second to the output of the ignition coil. Now we turn the key in the ignition lock - it should be in position I. Next, we look at the light bulb - if it is off, then nothing else needs to be done. However, this is not always the case. If the light is still on, then you need to turn the distributor clockwise until it goes out. After that, slowly turn the distributor body in the opposite direction. This should be done until the light turns on again. Having fixed this moment, we tighten the mount - this time it must be done to the end.
How to understand that the set lead angle is correct
 Now all that remains is to check your car on the go. The procedure here is quite simple - you should navigate according to your hearing. We start the engine, get under way and accelerate the car to 50 kilometers per hour. Next, turn on the 4th gear and sharply press the accelerator pedal, listening to the engine operation. If you did everything correctly earlier, then the picture will be as follows - in about 2-3 seconds a detonation will appear. As the car picks up speed, it should disappear.