Soundproofing an apartment is the most important issue that every inhabitant of an apartment building probably thinks about. And if the soundproofing of the walls and ceiling does not cause questions, since many articles have already been written about it, today we will talk about how to make soundproofing of doors with our own hands, and below we give a video of this process.
Is a very important issue of concern to many homeowners. It is especially relevant for residents of Soviet-style high-rise buildings, because during the construction of these buildings, almost no attention was paid to protecting apartments from extraneous noise. As a result, tiny staircases, thin walls and plywood doors left absolutely no chance for a quiet life. There are several ways to change the situation and provide yourself with a comfortable existence. The first is to replace the door with a metal-plastic one, consisting of several layers, one of which is a high-quality sound insulator of varying degrees of conductivity.

The following materials can be used inside modern entrance doors:
- Foamed polyurethane. It is a good sound insulator, it does not let extraneous noise into the room and is characterized by high resistance to fire. The material adheres closely to the door leaf from the inside and does not transmit sounds.
- Foam plastic is characterized by a low specific gravity, protects against noise well, but in the event of a fire it becomes the cause of strong smoke.
Advice! Experts advise, if possible, to abandon the purchase of entrance doors with an internal foam sound insulator, since this material is characterized by a low level of fire safety.
- Mineral wool. Quite with good fire resistance, however, during operation, it absorbs moisture and sags under its weight.
- Corrugated cardboard. This is the cheapest option, however, its soundproofing characteristics leave much to be desired.
Modern models of entrance doors made of metal-plastic are additionally equipped with special sills and sealing contours, thanks to which the door leaf adheres closely to the door frame without the formation of any gaps. Expensive models are sheathed from the inside with a layer of artificial leather, which is also a good sound insulator.
Types of noise insulation for entrance doors and methods of its implementation
If it is impossible to replace the doors with better ones, you can make the sound insulation of the old door leaf and door frame yourself. It is performed in several ways.
Arrangement of the vestibule
It's no secret that metal is a poor sound insulator, while the characteristics of wood in this regard are much higher. Therefore, our compatriots often install a double door. The first of them is outdoor, in most cases it is made of reliable and durable metal and protects against the penetration of uninvited guests. The second one, the inner one, is made of wood and is an excellent barrier for all kinds of noises and smells. An air gap forms between the doors, which acts as a heater.

Each of you has probably seen more than once that a layer of sealant is glued around the entire perimeter of the door frame in new doors. If there are several such contour layers, they are able to provide truly high-quality sound insulation.
There are several types of soundproofing circuits on the modern market:
- silicone - mounted in a slot on a door frame or door leaf by means of a plastic rib.
- Foam rubber contour. It has an adhesive base, thanks to which it is easy to self-isolate the entrance door.
- The magnetic circuit ensures a tight fit of the doors and, as a result, good sound insulation.
Advice! The use of a soundproofing circuit is one of the most affordable and effective ways of soundproofing an entrance door, which you can do yourself.
Do-it-yourself soundproofing using upholstery
Not so long ago, a very effective way of soundproofing an entrance door with the help of its external finishing with a thick layer of batting was especially popular in the vastness of our Motherland. Some craftsmen generally managed to upholster the door leaf with an old blanket, and cover it with leatherette on top. Even now, when asked which sound insulation is better, they say with confidence: the one that is made with their own hands and with the help of a thick cotton blanket!
Today, isolon and synthetic winterizer are used as a sound insulator for door upholstery. They are laid in several layers, and covered with leatherette or artificial leather on top - to give the canvas a beautiful appearance.
As alternative options for soundproofing entrance doors, you can consider installing decorative panels on the canvas, installing rubber thresholds, sealing the gaps that form between the door frame and the walls with concrete.

Interior doors in their texture are much thinner than entrance doors, which is not surprising, because they are designed to divide the space inside an apartment or house. However, this does not mean at all that the issue of sound insulation of such structures is not relevant. If you take a large family, one part of which dreams of a daytime sleep, and the second - about watching a football match with all the ensuing circumstances, it becomes clear that you cannot do without good sound insulation of interior doors. But before talking about its types and methods of implementation, let us consider the materials from which the door leaf is made today. So, as materials for doors installed inside the apartment, they use:
- natural wood;
- Fiberboard (the most budgetary option);
- metal;
- plastic;
- mirror and glass plates.
The most popular doors are made of fibreboard (Fibreboard). Their canvas can be solid and hollow, with or without filler, with inserts of glass and other materials. Doors with glass inserts and hollow door leaves, which are generally a kind of resonators, are characterized by the lowest degree of sound insulation.
Speaking about which material is better for soundproofing interior doors, one should note a solid array of natural wood. But through plastic and glass doors, sounds and noises freely penetrate from one room to another.
Today on sale you can find high-quality soundproof doors that are made according to the sandwich principle. If they are installed in special boxes with automatic rubber thresholds, the sound absorption level can reach 26 dB. True, such a decision is not always justified, because the appearance of this kind of structures does not differ in particular aesthetic appeal.
Self-insulation of interior doors
Professionals assure: if the door between separate rooms within the same apartment is installed correctly, the noise level can be reduced by at least 12 dB. If, however, you also use the best materials for noise insulation, you can even more noticeably reduce the noise level.
Advice! Installation of interior doors in accordance with technical standards reduces the noise level by 12 dB.
Stages of soundproofing interior doors
- Sealing all gaps between the wall and the door frame (you need to use a sealant for this).
- Sheathing of the door leaf from the side from which extraneous noises penetrate into the room. The role of the filler in this case can be played by synthetic winterizer, foam rubber, mineral wool, batting. Dermantin, artificial leather and other materials are used as upholstery. Often, door leaves are sheathed with special sound-absorbing plates, which are glued with mastic and covered with decorative material.
- Gluing a sealant around the perimeter of the door leaf, for this you can take a regular profile hollow rubber cord.
Advice! The gap formed between the door leaf and the frame should not be more than 1 cm.
- Installation of a sill that will prevent the penetration of noise through the gap under the door. Today in stores you can find sills made of a wide variety of materials with a sound-absorbing effect.
Tips for self-soundproofing doors in an apartment or house
If you want to install beautiful interior doors with glass inserts in the apartment, which, by the way, do not differ in special sound insulation, it is better to give preference to models with special sound-insulating glass units.
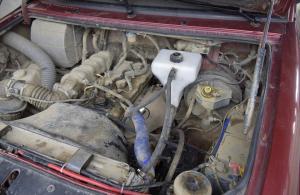
There is a lot of noise coming through the doors to the salon. Correct soundproofing of car doors will help to significantly reduce it. This process is not complicated, so you can do it yourself.
Materials required for work
The result expected after all the work has been done:
- reduction of road noise by 40%;
- doors will close quieter with a dull sound (due to an increase in mass);
- the sound quality of the audio system in the cabin will be significantly improved.
As materials for the upholstery of the passenger compartment, a variety of materials are used, which have an adhesive base and are made on the basis of mastic or bitumen.
Let's list the main groups:
- Bimastas. They consist of two layers - mastic and bitumen. This is a modern material that was developed 2 years ago. During this time, it is actively used as a sound insulator. They are from 2 to 5 mm. And they differ in external coating: fabric, aluminum, paper.
- Vibroplasts. They have good elasticity. They have three layers - the bottom adhesive layer, foil and water-absorbing polymer. The most common brand is vibroplast M2. No heating required during installation. Sold in sheets of 75x53 cm.
- Visomat PB 2-3.5 has an adhesive base. The second layer consists of a mixture of bitumen and expanded polystyrene. It is protected by a special release liner. Such a composition helps to damp the vibration of the door elements. For installation, you will need a building hair dryer to heat up the Visomat. Can be used at large temperature ranges - from -40 to + 70C. Before applying to the surface, it must be degreased with gasoline, White spirit, and dried. First, the corner of the gasket is removed and the sticky side is applied to the surface. Then a part of the sheet is warmed up with a building hairdryer, the peeled off part is also pressed to the surface and glued. It is necessary to smooth the material well so that all the air comes out. You must immediately cut the pieces correctly, because then it will be difficult to peel it off. You can use a Visomat with a thickness of 2 mm. In the store, sheets are sold in the size of 75x35 cm.
The material is selected with the goals in mind. If you need to improve the sound of the audio system in the cabin or just remove unnecessary sounds, the upholstery can be minimal, standard and maximum.
If you have simple acoustics and you are not a fan of loud music, then you can use Visomat MP or Bimast Super and cover only flat parts with them. If there is a powerful audio system in the car, then the entire inner side and technological holes, too, are covered with the same materials.
Material advantages:
- environmentally friendly;
- no fumes harmful to the body;
- affordable price;
- optimal dimensions, thanks to which you can immediately cover a large area;
- wide range of temperatures for operation;
- does not absorb moisture, as a result there will be no corrosion and fungus.
Dismantling the door and its components
The first step is to disassemble the door.
To work, you will need the following materials and tools:
- screwdrivers for parsing the door;
- construction knife;
- degreaser;
- insulation material.
It is necessary to remove the old upholstery in order to gain access to all interior parts. The difficulty at this stage is that you need to remember which screw was in this hole. But even here you can get out of the situation using scotch tape. They can glue the unscrewed screws and then nothing will be lost.

The window lifter and opening mechanism do not need to be disassembled. These elements will not interfere with sound insulation in any way.
After disassembly, it is necessary to clean all metal parts from dirt and degrease with White Spirit. During the cleaning process, the most important thing is not to scratch the factory paint, otherwise corrosion may form.
Vibration isolation of doors
It is needed to absorb its own sounds from the vibration of doors, as well as to reduce noise from passing vehicles. We paste over the inner side, which is from the side of the road.
Suitable materials for vibration isolation are:
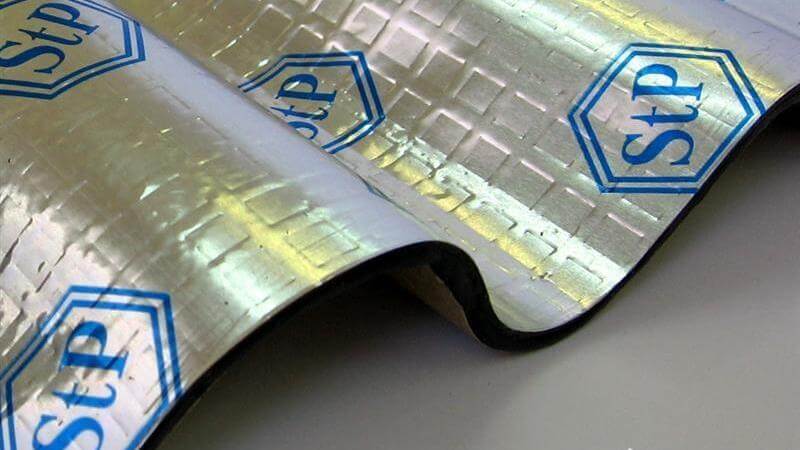
- StP Aero or Aero Plus;
- Vibroplast Gold;
- Bitoplast;
- Visomat;
- Bombs Premium;
- Accent Premium.
Even if the car door is tightly closed, a fairly large amount of noise still passes through it into the interior. Therefore, many drivers decide to tackle the car doors. This is not the most difficult work, which involves going through several consecutive stages. Usually, self-isolation is intimidated by the need to dismantle a large number of elements. Sometimes it is required to remove literally everything, as is the case with the soundproofing of the cabin. But with doors, everything is much easier. Therefore, it is not surprising that a large number of car owners decide to do this kind of work on their own. Here you will need to choose high-quality materials and follow certain rules when completing the task.
Technique for soundproofing car doors.Soundproofing methods
In total, several can be distinguished, depending on the level of the achieved effect. Do not rush to make a decision, because even using the most difficult method will not allow you to achieve an excellent result in sound insulation, if you do not take complex measures to process other body elements. Doors alone will not drastically change the situation. As a result, there are four methods of noise isolation:
- minimum;
- average;
- maximum;
- extreme.
Each of them has its own nuances, so you need to study these isolation methods in more detail.
Minimum noise insulation
If you plan to put serious acoustics in your car, you should forget about this option. It won't fit. If the goal is simply to reduce external noise inside the car, then feel free to use the presented method. Here, the doors should be pasted over with a continuous layer or at least 70% of the surfaces with a material capable of effectively. A vibration damper material with a thickness of at least 2 millimeters is also a good choice. At the same time, the noise isolator itself is glued to the inside of the door cards, which will reflect not only noise, but also act as a barrier for dust and moisture. Noise insulators are materials such as Splen or Accent. The advantage of this method is its low cost. But even it allows you to improve the acoustic situation inside the car without serious financial costs.

Average noise isolation
When looking for the best option for price and quality, you can stop at this method. Here, more specialized materials are used, which are installed in a slightly different way. This helps to reduce noise from the road, plus create a high-quality sound of the acoustics in the car. Vibration-absorbing material acts as the first layer on the door, the thickness of which should not exceed 2 mm. It is better to take a sheet with a thickness of 3 mm in the area opposite the speaker. It is also recommended to install an acoustic lens here. A layer of soundproofing material is laid on top. Although some believe that you can do just fine without it. Each side has its own arguments, so make the decision yourself.
Maximum noise isolation
The transition to this method is relevant for those who want to put a really powerful speaker system in the car with excellent bass in the doors. Here you need to prepare the doors for such speakers. The issue of getting rid of external noise no longer plays a key role here. But if you carry out such work, then it will be possible to easily solve the problem of extraneous sounds in the cabin coming from outside. The work is carried out in approximately the following sequence:
- The first layer is a vibration absorber up to 3 mm thick. It is not recommended to take thicker material, otherwise the doors will become too heavy;
- A layer of soundproofing material is glued on top, on which a waterproof glue layer is used;
- Technological holes can be closed with aluminum foil, which has an adhesive base;
- A rigid vibration isolator with a thickness of about 2-3 mm is placed on top;
- Next comes the soundproofing material in the form of Splan or an analogue. The thickness is recommended to be taken within 4-5 mm.
Door cards can also be treated with a 2mm vibration damping material by gluing a sound-absorbing material with a full surface structure under the cards.

Extreme noise isolation
It is used by those who install extreme acoustics that can literally knock out car windows. These are real fans of car audio who compete with each other and determine who is the loudest. The thickest and most efficient materials are used in door processing. It is important to understand that this approach will lead to a noticeable increase in the weight of the door. But many people simply ignore this aspect, since their main goal is to install the most powerful audio system.
- The door is reinforced with aluminum strips or rigid vibration damping material. They are laid with a small gap;
- A thick layer of vibration-absorbing material is rolled between them. Its thickness will be about 4 millimeters;
- Next comes the stage of soundproofing with the use of a sound absorber based on waterproof glue or with a latex film. All technological openings are covered with sheets of aluminum or polyester resin;
- From above, everything is rolled up with 3-4 millimeters of vibration isolation, and then there is a soundproofing layer from Splan or an analogue;
- To process door cards, take vibra pieces to eliminate vibrations. A thick sound absorber is placed under the vibration-insulating material.
There is a lot of controversy about the rationality of such an extreme. This does not always justify the investment and effort. If you have powerful acoustics, but you are not going to go to a car audio competition as a participant, it is quite possible to get by with an average or maximum method of noise isolation.

Necessary materials
They usually start by choosing the right materials. You should not first disassemble the doors and only then start studying the characteristics and properties of different insulators. You're just wasting your time. Everyone is interested in what kind of sound insulation is better to choose for the doors of their car, so that noise absorption is at the highest level, to satisfy the car owner. Much depends on what result you want to achieve. This kind of work is worth undertaking if you want to:
- reduce the noise level by about 30-40%;
- provide a quieter door closing;
- improve the sound of music in the cabin;
- improve the overall level of comfort inside the vehicle.
Here it is impossible to say unequivocally which specific sound insulation for the door will be better. It will not be superfluous to understand the range, since everyone puts their own meaning in the concept of good insulation for a car. Because of this, everyone chooses their own, suitable material for him. In general, insulators that can be used for door processing are divided into several categories.
- Bimastas. They include a layer of mastic and bitumen. A modern soundproofing material that has appeared on the market relatively recently. Copes with its functions perfectly. It is made in a layer of 2 to 5 millimeters. The outer cover can be made of aluminum, paper and fabric.
- Vibroplasts. This category of soundproofing materials is characterized by excellent elasticity. There are three layers in total. A layer of glue is used below, followed by foil, and the whole polymer layer with the effect of water absorption is completed. The most commonly used vibroplast with the M2 marking. It is not necessary to heat before laying, it is realized in the form of sheets.
- Visomat. This is a material with an adhesive base, a layer of bitumen-polystyrene mixture with an anti-adhesion pad. Due to its design, the isolator additionally cope with vibrations. To lay a sheet of material, you will need to use a building hair dryer to heat up to the desired temperature. Withstands temperature loads in the range from -40 to +70 degrees Celsius.

Having decided on the goal, each car owner will be able to independently decide on the material for soundproofing the doors. Decide what kind of car insulator you need to ensure easy installation with a reasonably effective result. The quieter you want to make in the cabin, the more serious soundproofing will have to be done. If you have a conventional audio system, if you do not like listening to loud music, use Bimast or Visomat, which should only be processed on flat door surfaces. For music lovers and fans of powerful acoustics, all internal surfaces and technological holes will have to be carefully processed. The use of the listed materials is considered the correct solution, since they:
- environmentally friendly;
- affordable;
- do not form harmful vapors when heated;
- have convenient sizes;
- withstand temperature loads in a wide range;
- protect against moisture and corrosion.
Door processing does not take much time and effort. The main thing here is to act consistently, step by step disassembling the structure and installing everything in the reverse order.
Sequence of the procedure
If you decide on the doors yourself, it is recommended to carry out the work in accordance with a certain sequence, adhering to important rules and recommendations. In general, the work can be divided into 3 main stages:
- dismantling;
- installation of insulating materials;
- reassembly.
At the same time, the installation includes the installation of vibration-insulating and noise-insulating materials. This is done in this sequence.
Dismantling
To perform the correct soundproofing of car doors, you first have to prepare the element for the application of special materials. In general, it is not so difficult to disassemble the door. Although some cars have their own nuances, due to which the owners face problems even at the dismantling stage. The set of tools and materials will consist of:
- screwdriver;
- keys;
- construction knife;
- degreaser;
- insulating materials.
The old skin is removed first, which will open up access to the interior space. The problem here is the need to remember the location of all fasteners. You can get out of the situation with simple marking or using adhesive tape, with which the fasteners are glued near their hole. But what is not worth spending time and energy on is dismantling window regulators and door opening mechanisms. They will not interfere with high-quality sound insulation. When dismantling is finished, be sure to clean metal surfaces from dirt and treat with sponges or lint-free rags dipped in a degreaser. The usual inexpensive White Spirit will do. Try not to touch the paintwork or cause mechanical damage. Otherwise, you risk creating a center for the development of corrosion with your own hands.

Vibration isolation
Some ignore the stage with vibration isolation of the doors, thereby making a serious mistake. Vibration protection is needed in order to absorb the own sounds from door vibrations and reduce the noise level coming from outside. The inner side, located closer to the road, is pasted over with vibration isolation. The following materials are suitable as vibration insulators:
- Bitoplast;
- Vibroplast Gold;
- Accent Premium;
- Bombs Premium.
StP significantly outperforms Vibroplast in weight, which is why it is actively used by motorists. Do not seriously increase the mass of the door, since this will quickly begin to wear out the hinges. Plus StP has a wider temperature range, which is why it is recommended for use in regions with very cold winters.

Always wear protective gloves when working with vibration isolators. Otherwise, you risk injuring your fingers and hands with the sharp edges of the insulators.
- The entire surface is pasted over, as far as possible. But don't touch the door amplifiers.
- If there are speakers in the doors, it is recommended to treat them with Bitoplast. This will reflect sound waves off the doors, resulting in a cleaner sound. But it is not worth using Bitoplast everywhere, since the material is characterized by the ability to absorb moisture.
- Next, you can apply the Accent Premium layer. A very worthy vibration isolator, which has become a worthy replacement for Splen. The accent has been specially designed to provide effective vibration protection. The material is not afraid of contact with moisture.
- The product is two-layer. The first layer is black and the bottom is green. The second is an adhesive base, which is distinguished by impressive water resistance. This characteristic allows the material to remain on metal surfaces for a long time.
- To achieve effective vibration isolation, it is better to close all technological openings. If they are large, use sheets of aluminum or fiberglass;
- Next comes the Visotmata or Bimasta layer. The bimast is heavier, which negatively affects the weight of the door after the completion of the work;
- When sound quality does not play a key role and the driver uses a conventional audio system, you can replace the Bimast with the StP Aero. This material is lighter, so the load on the hinges will be lower.
Now you can move on to the next step.

Noise isolation
The following are recommendations on how to properly insulate the doors of your car on your own. This procedure is designed to reduce the noise level entering the cabin from the street. Additionally, noise isolation diffuses the sound of the speakers, thereby enhancing the sound quality.
- Noise-insulating materials are applied on top of the vibration-insulating layer;
- Leave 3-4 centimeters below the bottom point;
- To isolate the skin, you can take a few layers of vibroplast and leave stocks around the edges;
- All joints are carefully sealed;
- After applying the material, all excess must be cut off;
- Such processing eliminates knocks and unnecessary noise;
- If there are plastic elements, they are pasted over with Madeleine.
There is nothing complicated here. But you need to be careful and consistent in your actions. Missing some important points, you risk ruining the result of the work done. Often, motorists make fairly common mistakes. To eliminate them, follow a few tips.
- Discard the use of Splan. This material used to be the pinnacle in the issue of sound insulation. But it was replaced by more modern and efficient products. Splen negatively changes the sound quality of music, contributes to the formation of moisture inside the doors, from which it quickly peels off, plus provokes the formation of corrosion.
- You need to glue the material in horizontal stripes. And this is done necessarily with an overlap. Leaving gaps between the sheets is not worth it, otherwise the result will not meet your expectations.
- By doing one thing, try not to spoil the others. Drivers often recklessly approach work, gluing with insulators literally everything in their path. Such inaccuracy often leads to the fact that the wiring is cut off, the cables break, the working mechanisms overlap, which is why the locks or window regulators stop working.
- Insulation quality and material weight. Look for a middle ground. Do not chase the thickest and most effective soundproofing products. In fact, in most cases they are not needed to achieve a good result. And heavy insulation loads the door hinges, which is why they quickly wear out and break.
When you have completed all the work, sequentially assemble the doors in reverse order. There are usually no major difficulties here. Especially for those who have previously taken care of the correct labeling.
Advantages and disadvantages
There is a lot of controversy as to whether the soundproofing of car doors is so badly needed, and whether soundproofing materials are of real benefit. Each revision of a car after it leaves the factory can have strengths and weaknesses. This also applies to soundproofing doors. If we talk about the advantages, then the following points are distinguished here:
- the overall level of comfort of the car increases;
- high-quality insulation increases the value of the machine in the eyes of buyers;
- doors can be used to install more powerful acoustics than a standard audio system;
- closing is carried out softer, more accurate, without unnecessary sounds.
As for the shortcomings, then, basically, it all boils down to the fact of increasing the mass of the door. Because of this, they gradually begin to sag, the hinges wear out, and repair is required. The advice is simple. Do not forget about the lubricant for the doors, do not overuse the amount of insulating materials, and also try not to keep the doors wide open. Another conditional minus is manifested in the form of poor audibility of what is happening outside. Some people really consider this a disadvantage, since the driver hears the signals of other cars worse. But here he has rear-view mirrors at his disposal, which you need to periodically glance at.
It is really not that difficult to make high-quality sound insulation for doors. Dismantling takes a little time, and there are no complicated parts that must be removed before applying a layer of vibration isolation and sound insulation. Therefore, many people prefer to do this work on their own. Based on the recommendations given, following the sequence of actions and choosing high-quality materials, you will certainly be able to achieve an excellent result.
Soundproofing car doors is one of the most popular types of tuning. It makes the door heavier and seals, protects from outside noise, improves the sound of music. There are minimum, average, maximum and extreme.
With the help of such tuning, different goals are achieved. This is getting rid of noise, drafts, improving acoustics, etc. The thickness of the door metal is the smallest in the entire body. The material resonates with sounds, vibrates, does not interfere with extraneous noise. At the same time, the total area is significant, so their lining is the first thing to start with insulating the interior.
Getting rid of external noise
This is one of the main reasons why "Shumka" of doors is made - this is what the common people call soundproofing. If no sounds from the street, which are emitted by people, other equipment, animals, industrial enterprises, and other sources, get into the car while driving, then the driver feels more comfortable. His attention is focused on the road and driving, he is not distracted and at the same time feels comfortable.
Getting rid of extraneous squeaks and bounce
The squeaks and rattles that your own car makes can also annoy and distract the driver. Sound insulation in this case does not solve the problem, but it will help not to be distracted by noise until it is completely eliminated.
Elimination of excessive blowing of drafts in the car
There are technological holes in the door. They are usually covered with casing and do not create drafts. But if gaps have appeared somewhere, the cladding has ceased to adjoin tightly, then an additional layer of insulation is mounted.
Improving door closing
When car doors are closed, they begin to vibrate, and sometimes it is not possible to slam them shut the first time. The introduction of additional layers of insulation makes the structure heavier. As a result, it falls into place on the first try, without rattling, vibration.
Improving the sound of music in cars
By insulating doors to improve the sound quality of music in the car, many are trying to turn the structure into a completely closed "box". But this is unreal. There are drain holes, a slot for the side glass, and the walls themselves are not rigid enough. If you want to improve acoustics, the main thing is to get rid of resonances. It is they who form extraneous sounds, distort the signal reproduced by the speaker.

How is door soundproofing done?
The procedure includes the following steps:
- dismantling the door, its trim;
- vibration isolation;
- performance of noise insulation;
- assembly and installation.
Each stage has its own nuances.
The choice of materials for noise and vibration insulation
There is plenty of space under the skin for the thick seal material. The main condition for choosing is that it should not be too harsh. Otherwise, it will push the skin away from the metal where they fit snugly against each other.
Materials fall into three categories:
- Bimastas. They consist of layers of mastic and bitumen with an outer coating of aluminum, paper or fabric. Thickness - 2-5 mm. A relatively new material on the market.
- Vibroplasts. Consist of three layers: glue, foil, polymer water-absorbing material.
- Visomat. The product is made of a bitumen-polystyrene mixture with an anti-adhesion layer on an adhesive basis. Protects against vibrations. Installation requires heating with a building hair dryer.

For vibration isolation of doors, Bitoplast, Visomat, Vibroplast Gold, StP Aero Plus, Accent Premium, Bomb Premium are suitable.
Materials differ in their characteristics. The choice is made based on the goals. You have to decide what you want: excellent acoustics, isolation from noise from the street or protection from drafts.
Soundproofing methods
All options have a different execution technology. Which method to choose is a personal matter for everyone.
Minimum
Its purpose is to reduce the level of noise coming from outside. It is not suitable for use of serious acoustics in a car. Advantages - ease of installation, low price. All that is required is to glue the door with a continuous layer of material. Thickness - at least 2 mm. The surface of the door card is pasted over. The isolate layer also acts as a protection against dust and water. This method is often chosen for soundproofing front doors.
Average
Used to reduce the level of noise coming from outside and also to improve the sound of the speaker system. Advantages - optimal price-quality ratio. Installation is more laborious than in the first case. A vibration isolation layer is applied. The second layer is soundproof. Additionally, it is recommended to install an acoustic lens.
Acoustic lens - a special device that looks like an optical lens, but made of different materials. It focuses the sound wave, does not allow it to scatter. As a result, the sound is clearer and louder.

Maximum
It is used to enhance the sound of a powerful speaker system with speakers in the doors. Eliminating sounds outside is not essential, but this problem is solved automatically. The procedure involves more steps than the minimum and average. We list all the layers of such insulation:
- Vibration isolator up to 3 mm.
- Sound absorber with adhesive layer.
- Adhesive aluminum foil, used for technological holes.
- rigid vibration isolator up to 2-3 mm.
- Soundproof Splen or others.
For noise insulation of door cards, a layer of vibration-insulating material is laid. Also carry out the installation of speakers.
Extreme
It is installed for powerful acoustics. Advantages - complete isolation from all extraneous sounds, the most pure sound. This makes the door much heavier. Stages of gluing car doors:
- The door is reinforced with aluminum strips or rigid vibration isolation.
- A layer of thick vibration-absorbing material is placed between the reinforced ribs.
- A glue-based noise absorber is placed on top.
- The holes are covered with aluminum or a special resin.
- Vibration isolation 3-4 mm is laid on top.
- The final layer is made of a sound insulator.

For the processing of door cards, vibration and noise-absorbing thick materials are also used.
Sequence of the procedure
The obeshumka does not have clear, unambiguous instructions. Each car model has its own nuances. However, the sequence of actions is the same for everyone.
Dismantling
Before gluing the sound insulation on the doors in the car, they must be dismantled. Then remove the casing, remove the moisture-proof film. Clean all surfaces, degrease with a suitable product.
On the inner part of the structure, a vibration isolation layer is glued between the stiffeners. The material should not be allowed to go over the ribs. This will create unnecessary air pockets and negate the effect. Therefore, you should carefully mark and cut the material. After the sticker, it is necessary to seal it; for this, a stitching roller is used. It is important to leave open the drain holes at the bottom of the structure.

When finishing a shield with technological holes, one should be guided by the traces of the removed moisture-proof film. During installation, you can immediately cut holes for fasteners, otherwise it will be more difficult to find them later.
Noise isolation
Consider how to properly glue sound insulation in a car on the door:
- remove standard noise insulation;
- degrease the surface;
- measure, cut out the desired piece of material;
- glue the layer, carefully repeating all the bends of the sheathing;
- along the way, cut holes for the speaker, clips, a set of wires, a handle;
- skip a strip of anti-squeak material along the edge of the insulating layer.
After that, the structure is put back. For the rest of the doors, the scheme is exactly the same.
Advantages and disadvantages
Noise isolation has a set of such advantages:
- being in the car is more comfortable, more pleasant, nothing distracts;
- the car can be sold at a higher price;
- you will be able to use a good speaker system without losing sound;
- the door closes softly, without extraneous noise.
There is no unequivocal opinion whether it is worth doing it. Any tuning has pitfalls. The door becomes heavier, as a result sagging, hinges quickly deteriorate. The driver hears worse what is happening outside. You have to focus only on the mirrors.
Before starting tuning, you should study how to properly noise the doors of a car and find out what materials should be used, otherwise self-tuning will lead to serious repairs.
The main purpose of noise insulation is to get rid of the noise that occurs when the car is moving in the cabin. Any car, even a new one, passes a certain amount of noise from engine operation, wheel rolling, noise from wind and sound flow created by associated and oncoming vehicles.
Factory insulation for most cars does little to cope with this task. The only exception can be recognized as models of the premium sector. The cheaper the car, the weaker its protection against extraneous noise. This is due to the fact that the installation of high-quality sound insulation is quite expensive, and in economy class it can be up to 10%. Fighting for the buyer, the manufacturer reduces production costs and, first of all, noise insulation.
The older the car, the more noise penetrates into its interior from the side, and extra creaks and rattles appear inside, which irritate the driver and passengers. Excessive noise in the passenger compartment causes the driver to get tired quickly and reduce road safety.
The only way out to solve the problem with increased noise is install additional noise insulation in the car.
Car soundproofing in service
The fastest and easiest way to get rid of extraneous noise in the cabin is to make a car soundproofing in a car service from experienced specialists.
But this method has one significant drawback - the cost of the work performed. The second problem is the choice of the car service itself, many promise to do it efficiently and on time, but not many implement it in practice.
The best way to choose a workshop is the reviews of familiar car owners who have performed soundproofing of the car on this service. Reviews on the Internet do not matter, because in order to attract potential customers, managers independently write praises on the sites.
Before starting work, you should visit the service and ask the master how and with what materials the work will be performed. It is good if noise insulation works are carried out in the workshop, it will be possible to assess the level of skill of the specialists and their attitude to the work being carried out. With the availability of funds and quality service, this is the best option for performing soundproofing of a car.
How to properly glue sound insulation in a car, video:
Do-it-yourself car soundproofing
For people who like to do everything on their own or do not have enough funds to perform work in a quality service, you can do the soundproofing of a car with your own hands. This method is convenient in that the work can be done slowly and in parts. To carry out the work, you do not need special skills and complex equipment.
This will require:
- Soundproofing material;
- Solvent or white spirit;
- Scissors and a stationery knife for cutting;
- Industrial dryer;
- Gas cartridge with a burner;
- Roller roller;
- A set of locksmith tools.
High-quality car sound insulation largely depends on the selected material. The industry offers a large selection of these materials, and it is quite easy to get lost in them. We will tell you how and what material is better for soundproofing a car.
The main property of any soundproofing material for soundproofing is lack of hygroscopicity. Therefore, when choosing a material, we pay special attention to this, since the accumulated moisture leads to metal corrosion.

Noise insulation materials for cars
Car soundproofing materials can be divided into the following types:
- Bituminous shale;
- Polyurethane;
- Felt;
- Liquid insulation of the car.
Vibroplast
Main material for noise protection of doors, floor, interior, boot lid and bonnet. It is a polymer, bitumen-shale composition with an adhesive layer to facilitate application to protected surfaces.
Aluminum foil was applied to the top layer by means of extruded duplication. To facilitate cutting, the surface of the foil has a pattern in the form of squares measuring 5 × 5 centimeters. The adhesive layer is protected with a special foil.
The material does not accumulate and does not absorb moisture, is not subject to decomposition from external factors, when applied correctly, protects the metal from corrosion, has the properties of a sealant.
The material is easily applied to the surface, following its contours. There are several types of bitoplast, the differences are the fillers used and the thickness of the layer. The main disadvantage of this material is its weight.
With a thickness of 2 millimeters, the weight of one square meter will be 3 kilograms, and a material with a layer of 4.5 mm already weighs 6 kilos.
The thicker the layer, the better the vibration and noise insulation characteristics of the vibroplast. But it takes 8 to 10 square meters to process a car, so the weight of the car will increase depending on the thickness of the material used.
Splen
This material is widely used due to its excellent noise insulation characteristics. The material additionally possesses good thermal insulation characteristics, does not absorb moisture, is light in weight and is easy to install thanks to a special adhesive layer.
In operation, it can withstand temperatures ranging from -45 to 64ºC, wear-resistant. It is used to protect the most noisy areas in the car: wheel arches, tunnels, doors, side pillars and other elements at your discretion.

Depending on the purpose, the splen is 2, 4 and 8 millimeters thick. The last number in the marking indicates its thickness, for example, Spleen 3004 has a thickness of 4 mm.
Thanks to a special adhesive layer, the sound insulation of the car interior is quite simple, it repeats all the contours of the surface, and excess and folds are easily cut off with scissors in place. The material is lightweight and does not reduce the vehicle's payload.

Felt
A widely used material for sound insulation. Possesses high rates of sound absorption, has a low cost. In addition to sound absorption, synthetic and natural felts have high thermal insulation properties and can be used in any temperature range.
A limitation in the use of felts was its ability to accumulate moisture. Felt has a porous system that absorbs moisture and condensation well.
It is almost impossible to dry the felt during operation, therefore it should be used only in those places where there is no possibility of moisture access to it.
The use of felt insulation under the carpets leads to rapid corrosion damage to the underside of the vehicle. Having accumulated moisture, the material not only significantly loses its sound-absorbing characteristics, but also becomes an ideal environment for the development of mold and mildew. Damp felt leads to constant fogging of the windows, the appearance of an unpleasant odor in the car interior.
The second main disadvantage of this soundproofing means is the complexity of installation, the adhesive coating applied to the felt adheres very poorly and often comes off the surface. Considering the above, it is better to limit the use of felt for soundproofing a car.

Liquid insulation.
Correct sound insulation of the car must be carried out in a comprehensive manner both inside the car and outside. Outside, the underbody and wheel arches, which are the main suppliers of noise to the interior, should be treated with noise-absorbing mastics.
Treatment of the external elements of the car with mastics not only reduces the noise level, but also protects metal elements from corrosion.
Modern manufacturers offer a large selection of liquid noise insulation: bitumen-shale and rubber-bitumen mastics, two-component and foaming compositions.
Liquid sound insulation should be applied to clean, grease-free surfaces. In some cases, the application of a soundproofing coating will require a primer for better adhesion.
Liquid formulations fill all joints well and provide additional protection against noise penetration. Liquid formulations are applied to surfaces with a spray gun or brush. When working with formulations, it should be borne in mind that most of them have a long drying time, up to several days.

Preparatory work
Soundproofing work should be carried out in the warm season or in a heated and well-ventilated area.
Car processing can be carried out as a whole or in small elements. For example, at the initial stage, you can process the bottom and wheel arches of a car with liquid noise insulation, then the trunk and doors.
The most time-consuming work is to protect the internal elements of the car's interior: floor, roof and pillars.
Before making noise insulation with your own hands, the car should be washed, this way the paintwork is protected from damage, and it is more pleasant to work with a clean car. When treating the bottom, the car should be installed on a lift, inspection pit or overpass.
It is best to start work with a lack of experience with simple and even surfaces. The luggage compartment and trunk lid are well suited for testing your strengths. We prepare noise-insulating materials for cars, equipment and tools and set ourselves up for a long and painstaking process to reduce the noise level in the car.

Execution of works
Underbody and wheel arches treatment
These works will slightly reduce the noise level in the car, but it is better to carry out them first of all for additional protection of the car from corrosion. Before starting work, the surfaces to be treated are thoroughly washed using car shampoos.
Special attention should be paid to hidden cavities, the moisture escaping from them will not allow high-quality application of soundproofing materials.
The surfaces are inspected and all corrosion deposits and rust are removed using abrasive materials or a rust converter. The surface is degreased and mastic is applied using a spray gun or an ordinary brush.

The outer surfaces of the car should be treated with soundproofing compounds in 2-3 layers, with intervals between layers of 2-4 hours.
Soundproofing the wheel arches of a car with your own hands, as well as the underside of a car, is a simple process, especially if you use a lift. In this case, all four wheels are unscrewed, otherwise you will have to unscrew each wheel separately with hanging the car with a jack.
After the work, you can assess the quality, the cabin should become a little quieter, especially in the area of the wheel arches.
Do-it-yourself soundproofing of wheel arches of a car, video:
Trunk and trunk lid.
Before starting work, take everything out of the trunk and remove the inner lining. We remove all debris and dust; for this work, you can use a household vacuum cleaner. We inspect the surfaces, if rust is found, we clean it or treat it with a rust converter, primer.
Degrease surfaces with white spirit and apply the vibroplast cut out according to the patterns. Vibration and noise insulation materials should be applied to each other as accurately as possible, leaving no gaps. For a better fit, heat the material with a construction hair dryer and roll it in with a special roller.
The main sources of noise entering the vehicle interior are the wheel arches and the spare wheel well and should be protected as carefully as possible.
After the vibroplast is completely laid, a splen is applied to it with an adhesive layer. Before gluing this insulating material, the protective film covering the adhesive layer must be removed from it. Excess spleen is cut off with a clerical knife.
we observe the quality of work, and if everything went satisfactorily, we proceed to processing the following elements of the car.

Do-it-yourself car door soundproofing
There are many opinions on how to properly make soundproofing of car doors, but everyone recognizes that it is through these elements that a significant part of the noise penetrates into the cabin and it is very difficult to carry out work there.
To carry out the work, remove the door trim, dismantle the built-in speakers ( in the presence of), if possible, dismantle the electrical equipment and wiring as much as possible. We remove debris, dust and degrease.
It is not possible to completely process the inner surfaces of the door with vibroplast due to the inconvenience of the design. Therefore, we coat the untreated fate with any mastic. On top of the vibroplast, we glue the spleen.
It should be noted that after the work has been carried out, therefore, it is not worth using heavily heavy materials.
We glue the outer surface of the door using a thin splen or bitoplast. We also glue the inner side of the door trim using a thin splen or bitoplast. After processing all the doors, the sound insulation of the car will significantly improve.
Video on how to glue doors:
Interior roof and floor
Do-it-yourself gluing a car with noise insulation inside the cabin is not as difficult as dismantling the trim elements. Therefore, work on the processing of the roof and floor should be carried out at the same time.
It is better not to touch the front panel yourself or entrust it to specialists. It is better to start work from the roof, gradually going down. For processing the roof, you can use a thin vibroplast, splenas onto which felt can be glued.
For the treatment of car struts, splen or vibroplast is used. To protect the floor, a vibroplast is used, on top of which a splen is applied. If the factory floor insulation is made of felt, then it is better to replace it with synthetic materials.
When processing the salon, you should pay attention to the following nuances:
- When processing the roof, do not use a very thick vibroplast, the center of gravity will shift and the car will lose in handling.
- Insulating materials that are too thick can create problems with the installation of the floor covering.
With the correct work, the sound insulation in the car will significantly improve, and traveling on it will be a real pleasure.
After the noise insulation works, the sound of the speakers will significantly improve, and the noise of the road will not interfere with normal conversation in the cabin.
Whether it is worth making a car soundproofing, how and what materials to use for soundproofing depends only on the car owner, his financial capabilities and skills.