Like any modern car, the VAZ "ten" was constantly improved in the process of mass production. However, all modifications concerned the originally installed components and assemblies of the vehicle. For example, the front fog lights were not included in the exterior lighting of the car, but both the relay and the PTF control button were installed in the electrical circuit.
For reference: in the rear headlights, the side light bulb had a second filament, which served as the fog lights.
It was activated using a button on the front panel and made it possible to improve the visibility of the car in poor visibility conditions for other road users driving behind.
The four-door sedan VAZ 2110 was produced by the Volzhsky Automobile Plant from 1995 to 2007. And unlike the usual "Zhiguli" the model was positioned as a car of a higher class.

In particular, the car was equipped with:
- electronic engine control system (ECM);
- diagnostic unit (on-board computer);
- galvanized metal was actively used in body parts;
- the body was painted using a new, more advanced technology.
Features of electrical equipment
In addition, the automaker carried out factory preparation for the installation:
- electric windows;
- power steering;
- fog lights in the front bumper.
Note!
The ECM was installed even on a VAZ-2110 with a carburetor power system and differed from later models with an injection fuel injection system.
Electrical diagram VAZ 2110

For reference: on models with a carburetor, the button for turning on the rear foglights had an intermediate position (fixation), thereby acting as a kind of contact protection.
That is why, starting in 2000, on models with an electronic system, it was required to better protect contacts. Therefore, a relay was installed in the PTF control circuit between the button in the cabin and "+". And the button itself was replaced with a dual-mode one.

In the photo - a diagram of switching on fog lamps VAZ 2110 with a PTF protection relay
Note!
The two-mode non-latching algorithm of operation provides that the button plays the role of turning on the relay circuit.
Those. closes the contacts with a small current, thereby avoiding the passage of high voltage through its contacts.
The illustration shows:
- fog lights (front);
- relay for switching on PTF with terminals 30, 85, 86 and 87;
- mounting block to which the relay is connected;
- outdoor lighting switch on the instrument panel;
- fog lamp switch button;
Also indicated by letters:
- to the power source (generator and battery);
- to the instrument lighting switch button.
Fog lights VAZ 2110
The owners of cars of the tenth family of different years of production were in an unequal position, because, firstly, they had a different electrical circuit:
- Rear PTF switch-on button with latching and without protection relay (in models up to 2000);
- Momentary button and with a relay in the PTF switching circuit (models from 2000 onwards).

Note!
When installing the PTF in the bumper, be sure to order the production of stickers on the headlights.
This film will protect glass from flying stones and plant branches.
Service PTF
At the same time, many owners of the first "dozen" do not know where the fog lamp fuse is located. And in the event of a malfunction, they do not know how to replace it.

On models after 2000 c. fuses are grouped in a single block.
Their technical parameters are as follows:
- The rear PTF fuse is marked F20 and rated for 7.5A;
- F4 10A fuse is responsible for protecting the front right fog lights;
- The F 14 10A fuse is responsible for protecting the front left fog lights.

The algorithm for the operation of fog lights has also been changed.
In particular:
- The headlights are switched on by pressing the button that supplies power to the 113.3747 type relay installed in the mounting block;
- Turning on the PTF on VAZ 2110 cars is possible only if the headlight switch is set to the outdoor lighting position.
In other words, PTFs are activated only with side lights or with dipped headlights. In this case, the inclusion is displayed to the driver using a light indicator on the button and on the instrument panel.
There are no particular problems with replacing bulbs in the headlights, since they were installed in an open position for servicing. But with the rear lamps, I had to suffer a little, since the entire design of the headlight unit was located in the trunk lid.
A car equipped with fog lights will come in handy for trips in conditions of limited visibility, fog and other adverse weather conditions. Another important step will be the competent installation and adjustment of these elements of external lighting. Despite the fact that the fog lights were not installed from the factory in all configurations of the Lada Grant, it will not be difficult to install them with your own hands.
How to correctly and safely implement fog lights on your Lada Grant in your lighting system with your own hands and get a tangible result from all this, read below in our material.
Preparatory stage (choice of PTF for Lada Granta)
In order to mount the PTF in the Lada Granta, special installation locations will be required. Fortunately, such standard places are already provided in the standard bumper from the factory. Their sizes are completely similar and identical with PTF from "Kalina" and have two different types.
The first one is sold under the brand name "Bosch" Ryazan and has a flat glass headlamp unit, and convex headlights are produced under production city of Kirzhach. These two types of headlights have the same mounts, so choose which headlights to buy for yourself.
Although, according to Grantovodov, the glasses from Bosch much stronger.
On the left side of the PTF from "Bosch" (LUCH), on the right side "Kirzhach".
If you do not want to "bother" with the installation of "Stock" elements, you can install standard PTFs, since you can also find a place for them in the front bumper.
First stage of installation
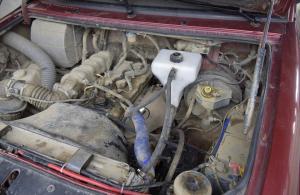
First of all, before installation, prepare the workplace for work, check the fog lamp kit for integrity and also the PTF connection kit for the presence of all wires, relays and fuses. If you have never installed such light elements on your own until now, then carefully study the car wiring diagram and the PTF connection diagram.
Step-by-step preparation process

Installation of PTF (photo instruction)
As you may have noticed, the bumper of the Lada Grant is a single molded plastic mold, in the body of which there are places for fog lights, hidden by plugs. The next step is to cut out these stubs.

Installation of PTF through a separate button
In order to connect the fog lights to the Lada Granta, you do not need to buy the entire set of wiring, relays and additional parts from scratch.
It is enough just to take a special kit for connecting the PTF for Lada cars of the Kalina / Prior / Grant family. Such a kit includes all the necessary materials, as well as detailed installation instructions. Still, as a rule, the main drawback of this wiring is short wires for the PTF switch button, but they can be lengthened without problems by cutting in the required length of wires.

Everything you need in this set is already present.
The installation should be carried out strictly according to the instructions, leading the wires from the PTF, directly to the mounting block, along the bumper and spar, laying the wiring to the button itself. It is important to secure all the wires with plastic clamps and place the wires in the corrugated tube where they can wear out as much as possible.
PTF connection diagram
We carry out the connection strictly according to this scheme:

When the PTF is connected according to this scheme, everything is guaranteed to work.
The only drawback of this option for connecting the PTF will be the absence of a warning lamp on the instrument panel.
Fog Lamp Operation Test and Final Assembly
Before proceeding with the assembly of all assembled elements, it is necessary to check everything for operability.
First of all, we check all the attachment points for the reliability of fixation - this applies to both the wires and the headlight unit itself. Then connect the terminal to the battery and see how the light elements work. If everything worked out and works, we collect everything in the reverse order of removal and enjoy the work done.
conclusions
As you can see for yourself, in order to carry out a competent and correct installation of the PTF on the fret of the grant, it does not require great skills and knowledge. You just need to strictly follow our instructions and keep your skill and patience.
The last step is to adjust the PTF so that the car ride is safe not only for you, but also for all other drivers traveling in the opposite direction.
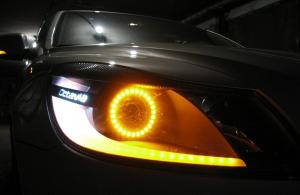
Any motorist knows how important the optimal illumination of the road is, especially when driving in difficult weather conditions - snowfall, rainstorm or fog. Those who often travel by their car cannot imagine the possibility of operating a car without installed fog lights. Unlike head optics, PTFs are capable of effectively illuminating the road even in heavy fog conditions.
Why install foglights
Modern cars are not in vain equipped with fog lights. The fact is that fog is a suspension of the smallest drops of water in the air, which almost completely reflect the light of the headlights falling on them. A solid white wall is formed, which becomes denser with an increase in the illumination intensity of the headlights. Movement under these conditions becomes impossible.
The fog lights are low and with a correctly adjusted position, only the roadbed itself is illuminated, and not the space in front of the car. This explains their effectiveness. In addition, the anti-fog performance is somewhat enhanced by the yellow filter, allowing a completely different spectrum to be used that is not reflected by water dust. Unfortunately, automakers do not always install the PTF in a regular way, forcing drivers to do it on their own.

How to connect PTF through a relay
The process of self-connecting the fog lights is no different, and is completed in a few hours. To do this, you should prepare everything you need in advance:
- copper wires;
- fuse with a capacity of at least 15 A;
- relay;
- power button, if there is no free on the panel;
- insulating tape or "heat shrink".
The diagram for connecting fog lights through a relay is extremely simple, and any person can cope with this task.

It is convenient to extend the cable to the battery under the pedals. Particular attention should be paid to the quality of the contact created with the terminals, as well as the need to install a fuse.
Important! It should be placed as close as possible to the battery - any diagram for connecting fog lights through a relay provides for a fuse of at least 15 A.
After these works, it remains only to install the foglights themselves.
Important points when installing foglights
Despite belonging to additional lighting equipment, and "optional", if they are installed by the car owner independently, they must comply with current regulations. So, the height of the fog lights should be at least 250 mm from the ground level, with a distance of no more than 400 mm to each dimension. Fog lights can only be installed symmetrically. Do not connect them directly to the ignition by installing a switch that allows them to be used separately from the side lights.

Having installed the headlights in their permanent place, connecting the foglights through a relay is not difficult. Both negative wires from the headlights are connected to ground, and the positive wires are connected to connect to pin 30 on the relay. If everything is done correctly, the check of the installed foglights will be successful. During the execution of work, the utmost attention is required to be paid to the quality of all wire connections. All twists must be done efficiently, and after that it is advisable to use a special "heat shrinkage" - this way you can exclude moisture from entering the compound and their oxidation.
When you independently connect the foglights through a relay, no less attention must be paid to their correct adjustment. They should not illuminate the space in front of the car - there are headlights for this. Installed fog lights are designed to illuminate the roadway, that is, they should be directed downward, onto the road. This will allow them to fulfill their main purpose, and will not cause blindness to oncoming drivers. Before connecting yourself, you can watch the video
The key to your safety is a properly equipped car. If your job involves frequent travel by car or you just like to drive and travel a lot, then you probably know how difficult it is for a driver without fog lights. Today, even a short distance trip should not be carried out without installed anti-fog equipment, since the slightest shifts in weather conditions can interfere with everyday traffic. All that is required is "fog lights", tools and a fog lamp connection diagram.
Where can you buy high-quality and inexpensive "fog lights"?
Automotive optics are an integral part of every car. It's like taking away sunglasses from a person on the sunniest day, with unknown consequences. So the car should have its own "glasses" just in case, you never know what can happen on the roads. The most common automotive optics are fog lights, which can be purchased at the car market or ordered in the online store. Of course, it is best to buy fog lights on the market, where a specialist will not only advise you on the model you need, but also tell you what the fog lamp connection diagram is.
What are the fog lights for?
The most important thing in fog lights is the precise delivery of light. The direct illumination of the road depends on this. The headlights, which are precisely adjusted, are capable of illuminating a path of 10 meters, which is absolutely sufficient at a low driving speed in the worst weather. Adjustment of fog lights is carried out directly during the installation of this equipment. How well you adjust the angle of incidence of light on the headlights depends on how well the "fog lights" will illuminate the road.
How to connect fog lights?
The principle of connecting fog lights is very simple, it is enough to know the most necessary skills in working with auto tools and generally have an idea of where and what is. If you are a complete "zero" in this matter, then it is best to contact a specialist.
How to install fog lights?
You'll need:
- fog lights
- 15 amp fuse
- block and relay foglights
- fog lamp switch button
- wires and electrical tape.
Installation of fog lights is very, although there are some differences. Although, judge for yourself.
- It is necessary to remove the center panel. There you will see two lamps for the illumination of the oven regulator, they are of no use to us, but the wires themselves are very handy. Run your hand along the wire to the very end, there you will find a two-pin connector, which is what you need. The first contact on the relay will be attached to it.
- We take the first wire and connect it to the oven illumination connector, and the other directly to the button.
- Next, the wire must be connected to the relay, thereby we have a circuit of 12 volts from the dimensions of the car and the relay contact 85. Connecting the fog lamp relay is completely straightforward, as you can observe. Therefore, even a beginner can handle this.
- The next step is to stretch pin 87 under the pedals to the battery, and you need to put a fuse, the closer you put it to the battery, the better.
- We throw contact number 86 of the relay on the body.
- And the last one is the fog lights themselves. Each headlight has two wires (plus and minus). Throw the minus on the body, but the plus from one and the second headlights must be connected and extended to the battery. Next, lift it onto the relay, so that the wires are not noticeable, and connect it to connector number 30. Now you can check the foglights for serviceability. That's all.
Fog lamp relay wiring diagram:

Rules for the installation of fog lights.
Nowadays, there are certain rules on how to install fog lights. This is spelled out in the Traffic Regulations. It contains all the necessary criteria for where and how to install the anti-fog equipment. But in order not to torment yourself and the car, you can simply contact a specialist who knows all this ins and outs. This will shorten both the installation time and your nerves. The rules of the road also contain a diagram for connecting fog lights, which will help an inexperienced driver figure out everything.
Requirements for fog lights.
To illuminate the path well for the driver, the fog lights must have a clear beam boundary at the top, that is, the light must propagate above the horizontal plane. It is necessary to install the headlamp from the bottom of the car, since a certain layer forms there between the light and fog for good illumination. If the headlight connection diagram involves the installation of equipment at the bottom of the car, then you will need plugs. This is a kind of protection grid against stones or sticks, which during driving can damage the headlights. The fog lamp plug will ensure the safety of the part on any roads and at any time of the year or day.
If your car has fog lights, then you need to keep them clean at all times. This will make the equipment more durable and the light diffusion more clear. This requires premature polishing of the headlights.
You can use a similar service at a car wash or perform the action yourself. saves you time and money, and it's a pretty easy process.
Parktronic as a type of automotive optics.
Another equipment from automotive optics is parking sensors. This device is designed to facilitate parking in extreme urban conditions. Mounting of such equipment is not difficult, therefore, any car owner can do it.
And it doesn't matter what car you drive and what "bells and whistles" are present in it, the main thing is that everything is safe for you and your loved ones in it. During the installation of fog lights, it is quite convenient.
Installation of fog lights - video
Fog lights are designed to generate a flat and wide beam of light above the road surface. This direction of the light beam minimizes illumination of the fog volume in thickness and improves visibility from the driver's seat. Failure to comply with the rules and wiring diagram for fog lamps when installing them on their own can lead to accidents.
[Hide]
Requirements for installing foglights
The location of the fog light lamps directly in the headlights is allowed.
The rules for installing headlights are regulated by two regulations:
- GOST 8769-75 or standard CMEA 4122-83;
- the state standard of the Russian Federation GOST R 41.48-2004, corresponding to the UNECE Regulations No. 48.
The generalized requirements are as follows:
- The installation site is located at a distance of not more than 400 mm from the side surface of the vehicle body. The distance is measured between the side plane and the outside of the headlamp.
- Only two fog lamps can be installed. The standards separately stipulate the mandatory installation of foglights on tourist buses, as well as on vehicles operated on mountain roads.
- The lower edge of the anti-fog lighting device is located at a distance of at least 250 mm from the road surface.
- Fog lights must have a horizontal field of view within the range from + 15º to -10º, and vertically - from + 45º to -10º. It is inadmissible to obscure the headlights with vehicle parts within the specified angles.
- Fog lights must be connected in parallel with the side lights.
- Fog lamp diffusers shall emit a beam of light below that of the dipped-beam lamps.
- The use of transparent filters or selective yellow is acceptable. It is unacceptable to use glasses of different colors on the same car.
The standards do not have special instructions for installing fog lamps on cars, so the owner can install their kit on his own.
What do you need to install fog lights?
For self-installation of fog lights, a minimum set of tools is required. The car owner must have the knowledge and skills to work with electrical wiring, since the safety of the car as a whole depends on the correct installation.
Set of tools:
- color electrical circuit of the car;
- nippers or side cutters;
- a knife for cleaning wires;
- pliers for crimping terminals (terminal block);
- soldering iron.
A set of materials required for installation:
- a set of fog lamps suitable for installation in standard holes in the bumper or universal ones that are mounted on the surface of the bumper;
- stranded copper wire with a cross section of 1.5-2 mm² with insulation capable of operating at low temperatures and resistant to gasoline and oil vapors;
- relay for turning on (usually standard relays for turning on headlights from front-wheel drive VAZ models are used);
- external housing for installing a knife fuse;
- knife fuse 30 A;
- control key suitable for the interior design (preferably with a backlight lamp);
- connectors and terminals for connecting wires to circuit elements;
- heat shrink tubing of suitable diameter;
- electrical tape on a polyethylene or cloth base;
- plastic ties;
- automobile corrugated hose for wire laying.
 Fog light set for Ford Focus 3
 Connection diagram
For installation, there are two possible connection schemes for fog lamps:
- parallel;
- consistent.
When connected in parallel, the positive wire goes to each headlamp from the relay contact. The relay is powered through a 15 A fuse, which is sufficient for most fog lamp models. It is advisable to place the fuse as close to the battery terminal as possible.
Signal voltage + 12V should appear only with active ignition. This measure excludes the possibility of headlights working when the engine is off. If desired, you can provide auto ignition of the headlights after turning on the ignition. For this, the signal wire is connected to the battery charging indicator lamp in the instrument cluster. The button must be on.
 Parallel connection
 Series connection reduces the current consumption and the brightness of the lamps. A similar scheme is used to use fog lights instead of standard headlights.
 Serial connection
 The connection of additional headlights through the relay is demonstrated in the video tutorial from the "AUTOELEKTRIKA - Steel Horse" channel.
How to install and connect with your own hands?
Installing fog lights on your own begins with the development of a connection diagram. A properly designed circuit avoids unnecessary wires and ensures reliable operation of the electrical circuit. Installation work is recommended in a garage, although many owners install outdoors.
Installing PTF in the front bumper and tuning
There are three installation methods:
- into regular openings;
- on an external bracket;
- in a blank bumper, not intended for the installation of headlights.
Customization is done using the homemade template below. The template is installed perpendicularly at a distance of 5 m from the headlights of the vehicle. Adjustment is made until the upper edge of the light spot coincides. The coincidence line is located 100 mm below the height of the center of the lamps.
 Approximate view of the template for customization
 Adjusting the fog lights provides increased driver visibility and reduces the risk of oncoming traffic being dazzled by the light.
Installation of PTF in a blind bumper
The most difficult and time-consuming option is to install fog lights in a blank bumper (i.e., one that does not have factory holes for this):
- Dismantle the bumper from the car in accordance with the instructions for repair and operation.
- Determine the optimal installation location for the headlights in terms of body shape and compliance with regulations.
- Make a hole for the headlights. The best way is to drill holes around the perimeter and sawing the gaps with a file. The hole has to be adjusted to ensure proper fit between the body and the decorative frame. Small fragments of the bumper are carefully cut off with a construction or office knife.
- Drill holes for the fog lamp housing, which is secured with suitable bolts.
- Install the headlamp in the housing and fit the protective strip. She clings to the plastic bumper.
- You can adjust the headlamp using the special key included in the kit.
Installation of PTF on an external bracket
Mounting option for foglights on a steel bracket:
- Mark the attachment points of the bracket to the bumper in accordance with the requirements for the installation of fog lights. As a rule, additional headlights are installed on the bracket.
- Screw the bracket to the bumper with self-tapping screws or bolts.
- Install the fog lights on the attachment points, connect the wiring.
Installation of PTF in standard openings
In order to put the headlights in a bumper with standard plugs, you must:
- Raise the front of the vehicle by padding a piece of wood under the wheels with a height of 150-200 mm. For greater convenience of work, you can install the car on a lift.
- Remove the protective guards covering the lower section of the bumper.
- Unscrew the clips of the standard bumper plugs.
- Insert the fog lamp into the guides and fix it with standard screws. If non-original headlights are used, there may be a discrepancy between the dimensions and attachment points. In this case, you have to fit the parts to each other. Below is a photo gallery of the installation of Chinese foglights in the bumper of the Hyundai Elantra HD.
Broach wiring
When broaching and installing wiring, you must follow the safety rules:
- disconnect the battery;
- the wire cross-section must correspond to the conducted current;
- the joints must have reliable contact;
- only wires of the same material can be connected (to reduce electrochemical corrosion);
- it is advisable to spill twists with solder;
- the joints of the wires are insulated with a heat shrink tube or electrical tape;
- Avoid placing wiring connections in locations subject to flooding;
- to protect against bends and chafing, it is recommended to protect them with a split corrugated tube;
- wires are laid parallel to standard bundles and fixed to them with plastic ties;
- the power supply circuit of the fog lights is necessarily protected by an individual fuse;
- when laying the wire, check that there are no hot or moving elements on the way, as well as sharp edges.
Failure to comply with the rules of safe electrical wiring leads to overheating of the circuits and a fire that can destroy the vehicle.
Testing wiring and headlights
Approximate wiring sequence:
- Carry out preliminary wiring to the fog lamp connectors.
- Pass the wires inside the bumper through the corrugated tube.
- Withdraw the negative leads from the fog lights and connect to the body. It is advisable to use the standard weight bolts available on the front side members.
- Remove the front wheel and wheel arch liner (alternately).
- Determine the location of the relay. The relay must be used without fail, since direct switching of the lamps with a switch will lead to rapid burnout of the contacts. The relay can be placed in an empty space in a standard mounting block or anywhere on the instrument panel.
- Since the fog lights must work in conjunction with the side lights, the connection is made from the size block. Below are photos of the process of connecting the wiring on a passenger car Volkswagen Polo Sedan.
Installation of the PTF switch
The most common method of turning on fog lights is a button that is installed in a regular place or at any other point in the driver's reach. Regular places for buttons are closed with removable plugs, occasionally they are covered with dashboard material. In this case, you need to cut a hole corresponding to the dimensions of the button body.
A separate item is to consider the installation of a steering column switch block equipped with a rotary fog lamp switch. To do the job, you may need a special tool - a Torx screwdriver and a special wrench for the center bolt of the steering wheel.
Connect the steering column switch in the following steps:
- Unfasten the two steering column trim halves.
- Separate the parts, overcoming the resistance of the clips. Care must be taken when disassembling so as not to break the plastic clips.
- Next, you need to remove the steering column switch, which can be removed without removing the steering wheel or with removal. In the first case, it is enough to bend the spring clip, remove the lever and disconnect the connector. After that, another switch is put in and the removed parts are installed in place. In the second case, dismantling of the steering wheel and airbag (if any) is required. The way to remove the pillow is different for each model. Hold the part to be removed as it may slide off the mountings and tear the cable harness.
- After removing the pillow, it is required to unscrew the central bolt that secures the steering wheel.
- Remove the steering wheel, disconnect the plugs from the steering column switch.
- Unscrew a few screws securing the switch and remove it from the column.
- Install a new unit and reassemble. When installing the steering wheel, it is necessary to ensure the correct position of the steering wheel spokes and the front wheels. The center bolt must be tightened to the recommended torque.
- Connect the power supply and check the operation of the switch box.
An example of installing a new steering column switch lever on a Hyundai Solaris car.
On some European cars, the fog lights are switched using a rotary switch located on the instrument panel. When installing headlights on such a car, you need to bring the wires from the lamps to the plug and install a light switch with a fog control function.
Video
The wiring diagram for the installation of fog lamps is shown in the video filmed for the Car Lover channel.