the gaer is wrong, DRLs are used without dimensions, and independent installation is allowed on the vehicle out of production! !!!Daytime Running Lights, what should they be?
Rummaged through the i-net, questions remained ...DRL - vehicle lamps, directed forward and used to increase its visibility when driving in the daytime.
Traffic rules: clause 19.5. During daylight hours, dipped-beam headlamps or daytime running lights must be switched on on all vehicles in motion for the purpose of their identification.
Traffic rules: clause 19.4. Fog lights can be used:
...
instead of passing headlamps in accordance with paragraph 19.5 of the Regulation.GOST R 41.48-2004 (UNECE Regulations N 48)
Uniform provisions concerning the certification of vehicles for the installation of lighting and light-signaling devices
6.19 Daytime running light
6.19.1 Installation
Optional on cars. Prohibited on trailers.
6.19.2 Number
Two.
6.19.3 Installation diagram
There are no special prescriptions.
6.19.4 Placement
6.19.4.1 Width: The point on the apparent surface in the direction of the reference axis which is farthest from the vehicle's median longitudinal plane shall not be more than 400 mm from the extreme outer edge of the vehicle.
The distance between the inner edges of the two visible surfaces must be at least 600 mm. This distance may be reduced to 400 mm if the overall width of the vehicle is less than 1300 mm.
6.19.4.2 In height - at a distance of 250 to 1500 mm above the ground level.
6.19.4.3. Length - at the front of the vehicle. This requirement is deemed to be met if the emitted light does not interfere with the driver directly or indirectly as a result of reflection from the rear-view mirrors and / or other reflective surfaces of the vehicle.
6.19.5 Geometric visibility
Horizontal angle beta = 20 ° outward and inward. : o
Vertical angle alpha = 10 ° up and down from the horizontal. : o
6.19.6 Direction
Forward.
6.19.7 Functional wiring diagram
If installed, the daytime running lights shall turn on automatically when the engine start / stop control is brought to the "on" position. It shall be possible to activate and deactivate the automatic activation of daytime running lights without the aid of a tool.
Daytime running lights should turn off automatically when the headlights are turned on, except when the headlights are turned on for a short period of time to signal road users.
6.19.8 Tell-tale
Optional closed loop.
6.19.9 Other regulations
No.Address: Yekaterinburg
Posts: 3,171
Well, I hope everything is pretty sane here:After November 20, 2010, the text of paragraph 19.5 of the road traffic regulations will be significantly reduced, however, the group of vehicles that it will cover will increase significantly:
19.5. During daylight hours, dipped-beam headlamps or daytime running lights must be switched on on all vehicles in motion for the purpose of their identification.
The dipped headlights should now be on on all vehicles and always. He also had an alternative - the use of daytime running lights, which are always on.
With regard to fog lamps, paragraph 19.4 has undergone minor changes:
19.4. Fog lights can be used:
- in conditions of insufficient visibility with low or high beam headlights;
-in the dark on unlit sections of the road, together with the dipped or main beam headlights;
- in place of the dipped headlights in accordance with paragraph 19.5 of the Regulation.Therefore, fog lights are also an alternative to dipped beam.
Let's summarize. After November 20, 2010, at least one of the following lighting devices must be switched on on each vehicle: low beam, daytime running lights, fog lights.
__________________
Many car enthusiasts have already heard about the benefits of DRL and are starting to look for a decent model in stores. The assortment is widely represented by Chinese junk costing from 300 to 5000 rubles. Some do not understand why to put them on the car and buy junk for 500 rubles, which shines a little brighter than the dimensions, power is 2 watts. You've probably seen these, they still shine with a blue light, and some of the LEDs are off or blinking. Then they have the problem of how to connect the running lights so that they last longer. Garage craftsmen offer various DRL connection schemes, the most difficult thing is to choose the right one.
Common names that will be used in the text: DRL "Daytime Running Lights", daytime running lights.

- 1. Types of connection
- 2. Mode of operation
- 3. How to connect DRL with a control unit
- 4. DRL controller
- 5. Choosing a stabilizer
- 6. Connection via relay
- 7. Other unpopular ways
- 8. Verifying the installation
- 9. Example of benefits
Connection types
 DRL Eagle Eye, Eagle Eye
The connection diagram of the running lights depends on the configuration and your budget. There are 3 types of equipment:
- the most inexpensive, only DRL;
- average for the price, stabilizer included;
- expensive, with a control controller.
If you have the cheapest and the worst ones, then there is no controller or control unit included. Such a block serves as a voltage stabilizer and on and off control.
In the middle configuration, there is a voltage stabilizer for 12V. There are voltage surges in the automotive network, and LEDs do not like this very much and fail. The stabilizer will greatly extend the life of the LEDs. But in this option, you will have to choose a place to connect so that they turn on only when the engine is running. There are many places for this, for example, an oil pressure sensor or a generator.
 Domestic model
The expensive version comes with a control unit that connects directly to the battery in the car. According to the principle of operation, they are of two types:
- determine the difference between the number of volts with the engine off and on;
- cheaper, it is turned on when the voltage rises above 13V.
The first option is the best, regardless of the voltage on your battery, always turn on and off correctly. The second option is budgetary and does not always work. With the engine off, the number of volts must fall below 13V for the controller to turn off the DRL. If your battery is new or well charged, then even after stopping the engine, it will have a voltage above 13V for up to several hours. That is, the daytime running lights will not turn off on their own until it is less than 13V. The only drawback will be its own power consumption when the controller is waiting for the engine to start. It will discharge the battery along with the burglar alarm.
Working hours

According to the technical regulations for cars, DRLs should automatically turn on when the engine is started. When you turn on the dipped beam, they should automatically turn off so as not to dazzle in the dark.
There are also combo models with installed turn signals on sale. The section for duplicating direction indicators is connected separately parallel to the standard turn signals. A stable diet is also required.
 DRL with turn signal
For models with additional control, there is a follow-up light function that works 10 minutes after the engine is turned off. It illuminates your way to your home or dugout, depending on where you live. Osram DRL has a mode in which they do not turn off, but dim by 50%. just don't know how legal it is and whether it will blind you.
How to connect a DRL with a control unit


DRL controller

I prefer the DRL connection diagram using the control unit, the most reliable way, suitable for any car and does not require any knowledge. Many car enthusiasts buy a DRL control unit from AliExpress - it is inexpensive, and the reviews seem to be good. However, most of the reviews are left either at the time of receipt of the product, or after several days of use. In fact, absolutely all DRL controllers from AliExpress are short-lived and have the following disadvantages:
- the principle of operation does not comply with GOST;
- there is no stabilization (for the majority);
- poor quality materials and workmanship;
- the features of the on-board network of the car are not taken into account;
- no guarantee;
- some do not have moisture protection.
Of the quality options, I can single out one from a Russian manufacturer, which fully complies with GOST and is of good quality. Also, the DayLight + controller has built-in stabilization, which will significantly increase the service life of the navigation lights.

Choosing a stabilizer

In this view, the first and second methods will be combined. Even if your daytime running lights do not have a stabilizer, I recommend buying one or making it yourself.
You can buy Chinese modules at a price of 50 to 120 rubles, so as not to order on Aliexpress, look at Avito, there are very reasonable prices. The most common modules are pulse LM2596 and linear LM317. They are of course outdated, but they will pull the current by 1 ampere, it will be a power of 12 watts.
Modern for 2016 are considered on microcircuits XL6009, XL4015. Their efficiency is higher and they heat up much less. Withstand a current of 2 Amperes without a cooling system for the microcircuit, this is equivalent to a load of 24W.


Relay connection

On forums and sites, you will find different ways of how to connect daytime running lights with your own hands, for each brand it will be different. Specialized relays are also sold, for example, Forget-me-not, designed for any car.
The principle of operation is simple. The daytime running lights are powered from the ignition wire. The positive wire from the far and near breaks the circuit when voltage appears on it. A 5-contact relay is sufficient for this. First, look for the solution on forums that only specialize in your car brand. You may find an easier solution.


For example, in Duster, you can connect the DRL to the cigarette lighter, it is energized only when the ignition is turned on. It's better than looking for an ignition wire in the wiring. In any case, I recommend installing a fuse in case of a short circuit.
Many circuits use a wire size to disable the DRL. It is wrong DRL should not go out when you turn on the dimensions, only with low beam.
Another type of connection diagram for daytime running lights is the installation of a relay in a standard relay block of a car without any upgrades. It includes long distance by 30% or 50%, which will be enough to indicate transport on the road. If the far one consumes 120W, then 30% is equal to about 36W, 50% is equal to 60W.


Other unpopular ways

Many people are interested in how to connect a DRL without a relay on their own, but it depends on the electrics of your car, look for a solution in Internet clubs dedicated to your car. The most important thing is that power is supplied to this place after starting the engine.
The main circuit for connecting the DRL, through a 4 or 5 contact relay, which turns off when the near one is turned on. Who is not too lazy to rummage in the wiring of the car, connect from the oil pressure sensor or generator. On any vehicle, when the engine is started, the oil pressure lamp on the dashboard lights up, the signal from this wire is used to supply power. The second way, how to connect the running lights yourself, is to connect to the generator. They will turn on automatically when voltage is applied to the generator.
Checking the installation

Most car owners, after connecting the running lights with their own hands, like to take a photo of their junk. To make it not so dim, they do it at night from close range. Due to their illiteracy, they do not know what to check in sunny weather from a distance of 100 meters. Therefore, they are called daytime, not nighttime.
An example of the benefit
When traveling in winter for short distances, especially in severe frost, a large amount of battery power is spent on starting the engine. Over time, the battery loses its capacity and holds a charge worse. Using DRL instead of low beam will allow you to charge the battery faster while driving.
Let's count:
- low beam consumes about 100W, 2 lamps of about 50W each;
- decent DRLs up to 15W;
- 100W - 15W = 85W of energy will be consumed less.
For example, I have a regular heating element in Duster, which heats the interior until the engine warms up. Accordingly, the car will warm up faster.
Currently, LEDs are being intensively introduced into our lives. The main problem turns out to be how to power it. The fact is that the main parameter for the durability of the LED is not the voltage of its power supply, but the current that flows through it.
For example, red LEDs in terms of supply voltage can range from 1.8 volts to 2.6 volts, white ones from 3.0 to 3.7 volts. Even in the same batch of the same manufacturer, LEDs with different operating voltages can be found.
The nuance is that LEDs based on AlInGaP / GaAs (red, yellow, green - classic) withstand overcurrent quite well, and LEDs based on GaInN / GaN (blue, green (blue-green), white) when overloaded on current, for example, 2 times live ... 2-3 hours !!! So, if you want the LED to burn and not burn out within 5 years, take care of its power supply.
If we install LEDs in chains (serial connection) or connect in parallel, it is possible to achieve the same luminosity only if the current flowing through them is the same.
I also want to draw your attention to the fact that LEDs are very afraid of reverse voltage, it is very low 5-6 volts, reverse current pulses (in cars) can significantly reduce the service life.
So how to make the simplest current stabilizer?
To do this, we take if you need to stabilize the current within up to 1 ampere or LM317L if you need to stabilize the current up to 0.1 A.
This is how LM317 stabilizers look with an operating current of up to 1.5 A.
And so LM317L with an operating current of up to 100 mA.
For those who do not know Vin - this is the voltage supplied here, Vout - from here we get ...., and Adjust is the adjustment input. In a nutshell, the LM317 is a regulated output voltage regulator.
The minimum output voltage is 1.25 volts (this is if Adjust is "put" directly on the ground) and up to the input voltage minus our 1.25 volts. T.K. the maximum input voltage is 37 volts, then you can make current stabilizers up to 37 volts, respectively.
In order to turn the LM317 into a current stabilizer, only 1 resistor is needed!
The connection diagram looks like this: 

From the formula at the bottom of the figure, it is very easy to calculate the resistor value for the required current. That is, the resistance of the resistor is equal to - 1.25 divided by the required current. For stabilizers up to 0.1 ampere, the power of the 0.25 W resistor is quite suitable.
| Current (specified current for a standard series resistor) | Resistor resistance | Note |
| 20 mA | 62 Ohm | standard LED |
| 30 mA (29) | 43 Ohm | "Superflux" and the like |
| 40 mA (38) | 33 Ohm | |
| 80 mA (78) | 16 Ohm | four-crystal |
| 350 mA (321) | 3,9 Ohm | mono-vat |
| 750 mA (694) | 1,8 Ohm | three-watt |
| 1000 mA (962) | 1,3 Ohm | 5 W |
And now an example with all the above said. Let's make a current stabilizer for white LEDs with an operating current of 20 mA, operating conditions for a car (now light tuning is so fashionable ....).
For white LEDs, the operating voltage is 3.2 volts on average. In a car (passenger), the on-board voltage fluctuates (again on average) from 11.6 volts in battery mode and up to 14.2 volts when the engine is running. For Russian cars, let us take into account emissions in the "return" (and in the forward direction up to 100! Volts).
Only 3 LEDs can be turned on in series - 3.2 * 3 = 9.6 volts, plus 1.25 drop on the stabilizer = 10.85. Plus a diode from a reverse voltage of 0.6 volts = 11.45 volts.
The resulting value is 11.45 volts below the lowest voltage in the car - that's good! This means that the output will always be our 20 mA, regardless of the voltage in the vehicle's on-board network. To protect against surges of positive polarity, we put a 24 volt suppressor after the diode.
P.S. Select the number of LEDs so that as little voltage as possible remains on the stabilizer (but not less than 1.3 volts), this is necessary to reduce the dissipated power on the stabilizer itself. This is especially important for high currents. And do not forget that for currents from 350 mA and higher LM ka will require a radiator.
PICTURE 1
You don't need to install a Z1 suppressor or a zener diode for cheap LEDs, but a diode for a car is required.I recommend installing it even if you just connect LEDs with a damping resistor. I think it is unnecessary to describe how to calculate the resistance of the resistor for LEDs.
The number of LEDs in the chain must be selected taking into account your operating voltage, minutes of voltage drop across the zener diode minus on the diode.
For example: You need to connect white LEDs in the car with an operating current of 20 mA. Note 20 mA is the operating current for FIRM expensive LEDs !!! Only branded ones guarantee such a current, so if you do not know the exact origin, choose a current in the region of 14-15 mA.
This is in order not to be surprised later why the brightness dropped so quickly or, in general, why they burned out so quickly. This is also true for high-power LEDs. Because what is marked on the product is not always brought to us.
Question 1- how many can be included in sequence? For white LEDs, the operating voltage is 3.0-3.2 volts. Let's take 3.1. The minimum operating voltage on the stabilizer (based on its reference 1.25) is approximately 3 volts. The drop across the diode is 0.6. From here we sum up all the voltages and get the minimum operating voltage above which the current stabilization mode begins at a given level (if lower, the current will be lower, respectively) = 3.1 * 3 + 3.0 + 0.6 = 12.9 volts. For a car, the minimum voltage in the network is 12.6 - this is normal.
For 20 mA white LEDs, you can turn on 3 pieces, for a 12.6 volt network. Considering that when the engine is turned on, the normal operating voltage of the network is 13.6 volts (this is nominal, in other versions it may be higher !!!), and the operating LM317 up to 37 volts, everything is normal.
R1 = 125 / Ist
where R1 is the resistance of the current-setting resistor in Ohms.
1.25 - reference (minimum stabilization voltage) LM317
Ist is the stabilization current in Amperes.
We need a current of 20 mA - we translate into amperes = 0.02 Amps.
We calculate R1 = 1.25 / 0.02 = 62.5 Ohm.
We accept the nearest value of 62 Ohm.
A few more words about group switching on of LEDs. Ideally, this is a series connection with current stabilization. 

LEDs are basically zener diodes with very low reverse operating voltages. If there is a possibility of high voltage pickups from nearby high-voltage wires, each LED must be shunted with a protective diode. (for reference, many manufacturers, especially for high-power diodes, already do this by mounting a protective diode into the product).
Resistors are needed to equalize currents in circuits and are ballast loads in case of damage to LEDs in the array.
How to calculate the dropping resistor value for an LED. The calculation is carried out according to Ohm's law. 

The current in the circuit is equal to the voltage divided by the resistance of the circuit.
I led = V pit / for the resistance of the diode and resistor.
we do not know the resistance of the resistor and diode, but we know our operating current and the voltage drop across the LED. For low-power LEDs, a current of 20 mA must be taken
Knowing the drop across the LED, you can calculate the remainder of the voltage across the resistor.
For instance. The supply voltage is V pit = 9 volts. We connect 1 white LED drop on it 3.1 volts. The voltage across the resistor will be = 9 - 3.1 = 5.9 Volts.
We calculate the resistance of the resistor
R1 = 5.9 / 0.02 = 295Ω.
We take a resistor with a close higher resistance of 300 ohms.
Today, daytime running lights are a mandatory type of optics, which must be equipped with all cars used in the territory of the Russian Federation. Since no light source can work forever, our compatriots often face the problem of diode failure. In this article, we will tell you how to repair DRL with your own hands and in what cases it needs to be done.
[Hide]
Common DRL problems
Why do daytime running lights burn out:
- Due to wear and tear. This reason is one of the most common and it is caused by the fact that diodes over time simply work out their service life. There is no way to avoid this. Unless you can put on a car of better quality DRLs, the service life of which is longer, but the wear of the devices cannot be prevented.
- As a result of exposure to moisture. Diodes can burn out due to constant operation in moisture conditions. Usually, DRLs are placed on bumpers, so when operating a car in wet weather, it will not be possible to avoid water getting on the bulbs.
- The need to repair the running lights may arise due to the burnout of the diode elements. As a rule, such a problem is caused by the fact that DRLs require 12 volts for normal operation, while generators on modern cars generate about 14-14.5 volts. Of course, this is too high voltage for daytime running lights, so they can fail for this reason quite quickly (the author of the video about self-repairing daytime running lights at home is Artem Kvantov).
Instructions for the repair and assembly of running lights
If DRLs on your car stopped working, this is not a reason to throw them away and put new ones. You can always try to repair the running lights - this way you can save money and gain skills in repairing optics. The repair procedure itself includes several stages - dismantling and opening, replacing failed elements, as well as the subsequent assembly of the structure.
DRL repair is carried out as follows:
- First you need to dismantle the optical elements from the machine. Depending on the design features of the car, as well as the installation location of the running lights, you may need to remove the bumper. Alternatively, the removal of the optics can be carried out on the installed bumper, see the situation. When the LED lights are in your hands, you need to carefully dismantle the glass from the module.
If the layer of sealant holds the glass weakly, then it will be easy to dismantle it, but if you cannot remove the glass without effort, then use a household hairdryer. Exposure to heat will soften the sealant. After dismantling the glass, you need to disconnect the board from the body of the running lights, where the diode elements are installed. - In the next step, you can start repairing the diodes themselves. First, you need to clean the circuit itself and the optics housing, remove all sealant. Then you will need to determine exactly which of the diode elements have burned out in order to know which lamps need to be replaced.
Use three AAA batteries to pinpoint a burnt out light bulb. Depending on the design, diode bulbs can have one or two chips. After the failed elements are found, you can start repairing them. - It should be borne in mind that the diode bulbs that must be replaced are called emitters; if necessary, you can buy them at any thematic store or on the radio market. Purchase additional thermal grease for installation. Remove the burnt-out elements and solder new LEDs instead. Since you are working with a disassembled flashlight module, you can grind the surface of the housing itself, if necessary.
This procedure will make it possible to provide more optimal contact with the light bulb, respectively, their glow should be more stable. After that, apply thermal paste in an even layer. - When the replacement of the LED bulbs is completed, you can start installing the circuit, at this stage fix it as tightly as possible in order to prevent it from peeling off in the future. For a more even distribution of thermal paste over the surface, move the board in different directions. If the design of the modules provides for the use of bolts, then secure the circuit with them. Further, the glass of the module should be installed on the used sealant and securely fixed. If bolts are used in the structure, then they must also be tightened.
To exclude the possibility of water getting into the structure, make sure that after assembly there are no slots and gaps in the module structure, or any holes. In addition, for safer operation, it is also necessary to seal the wiring on the case. - When the sealant is completely dry, the LED module can be replaced. Connect the wires and securely fix the DRL in the place of installation. Check the operation of the bulbs.
The price of the issue
As for the cost, it all depends solely on the quality of the purchased products. As you know, Chinese
As you know, after the adopted traffic rules law in 2010, all vehicles must drive with daytime running lights in the daytime. If the cars are not provided with running lights by the factory, then they must be installed in accordance with the requirements and GOST or drive, including dipped beam or foglights. This bill in the traffic rules caused a lot of noise and many drivers began to actively discuss this issue on forums on the Internet.
What exactly does the traffic rules say about navigation lights in 2018? Are there GOST requirements for installing DRL? Is there a penalty for daytime running lights? With these and other important questions that worry motorists, let's try to figure it out in this article.
It's probably no secret to anyone that a car with daytime running lights on attracts more attention of citizens than a car with no headlights. It is for this reason that the traffic police inspectorate proposed to make an addition to the traffic rules. An alternative in the absence of DRL on the vehicle are dipped beam or fog lights.
When comparing navigation lights to existing headlights in a car, DRL has several advantages. In order for the headlights to burn, an obligatory supply of electricity is required, which is generated by the generator. While driving on the track, the generator, due to the constant speed, actively recharges the battery. In this case, the headlights are not energy intensive. If the vehicle moves around the city, where there are regular traffic jams and traffic lights, in which it is necessary to stand idle, then under these conditions the battery partially loses its charge and is discharged. The generator does not have time to recharge the battery, and the load of all switched on electrical devices makes itself felt.
Old vehicles may not be able to cope with such a constant electrical load, so they can quickly fail as a generator with a battery, and problems with wiring may arise.
DRLs consume significantly less electricity than bulbs in car headlights. In this regard, the factories began to build daytime running lights into the front light devices. As for the side lights, their luminous brightness is significantly low, so they will be simply invisible and, accordingly, there will be no effect from them. That is why they cannot be used for the place of DRL.
DRL according to GOST
The technical regulations of the vehicle contain clear information on the definition and requirements for installing DRL on the vehicle.
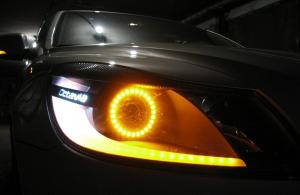
DRL - headlights of definitely white light with possible shades of yellow or blue, which are installed in the front of the car.
For correct installation, you must comply with GOST daytime running lights:
- installed in front of the vehicle;
- the distance from the ground should not be less than 25 cm and not exceed a height of one and a half meters;
- they must be spaced at least 60 cm apart;
- from the edge of the car body to the place where the lights are installed should not be more than 400 mm.

If there are no running lights on the vehicle and they were not supposed to be installed by the factory, then the driver must turn on either the dipped beam or the fog lamp lamps.
The driver can, at his discretion, put DRLs, if they are not. There is a large selection on sale now, they are of three types by type: with incandescent lamps, with halogen lamps and LED lamps. Undoubtedly, LED or LED-DRLs are the leader because they are energy efficient and require 10 times less electricity.
What does the traffic rules say about navigation lights?
Based on the traffic rules of 2016, namely clause 19.5, all cars while driving, both in the city and on the highway, must have DRLs or low beam or fog lights turned on. Observing these requirements, you can ensure the safety of pedestrians and motorists on the road.
If the rules for using daytime running lights are not followed, then the fine for such a violation for the driver will be 500 rubles (Article 12.20 of the Code of Administrative Offenses of the Russian Federation in 2016).
On the basis of traffic rules, it is necessary to use DRL:
- if there is a transportation of minor children;
- on motor vehicles, as it is difficult to see it from afar;
- when transporting oversized or hazardous and explosive substances;
- on minibuses and public transport to attract special all-round attention.
How to install DRL?
You can mount LED running light devices yourself and without resorting to the services of auto electricians and specialists. To do this, you need to adhere to a few simple rules. Of course, LED devices are installed as a set - two pieces. The main task during installation is to correctly connect them to the car's power supply. It is necessary that they light up when the ignition is turned on and vice versa turn off - if the ignition is turned off.
An approximate connection diagram for daytime running devices is shown in the following image:

Now on sale in the markets there are a large number of different LED DRLs ready for immediate connection. The accompanying manual is usually pretty clear.
Finally
Daytime running lights are aimed at attracting the attention of road users. This provision of traffic rules contributes to the maintenance of road safety. It should be borne in mind that in the event of an accident, the victim, with the detected DRLs not turned on, may be found guilty.